Golden tulips

Hello Everyone,

I am back today with a card idea which popped in my mind at night and I managed to find time today afternoon to make it. I am happy I did because it fits the Newton Nooks Designs Inky Paws Challenge #44:
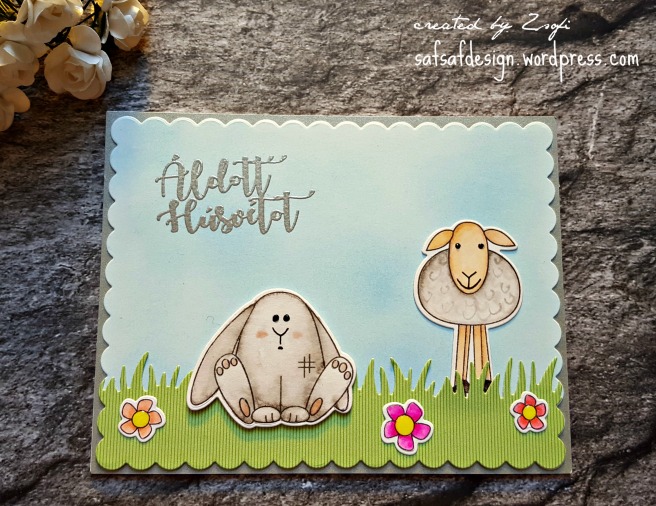
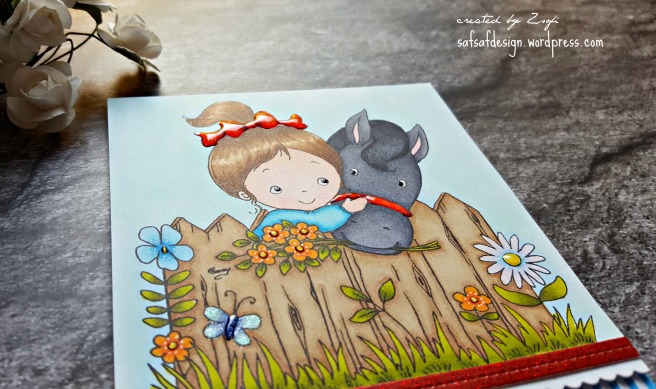
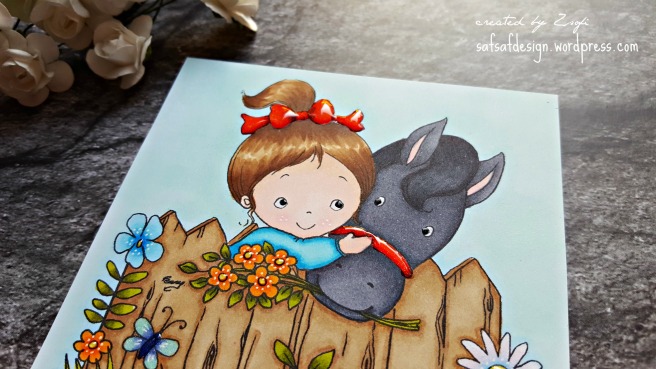
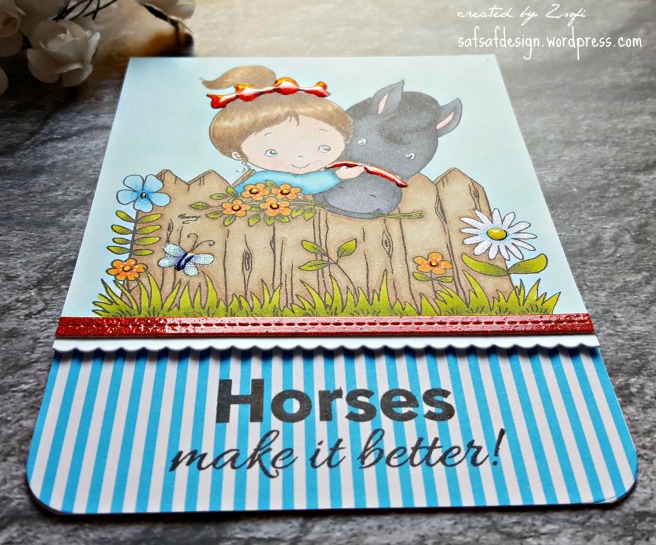
Here is my card:

20170414_162904 wm

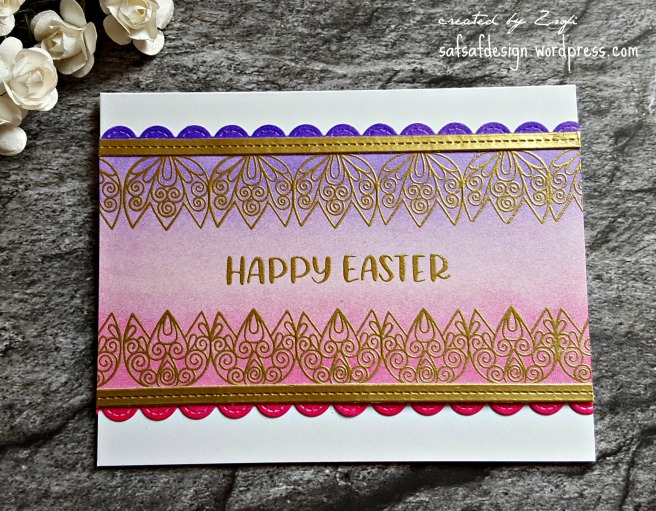
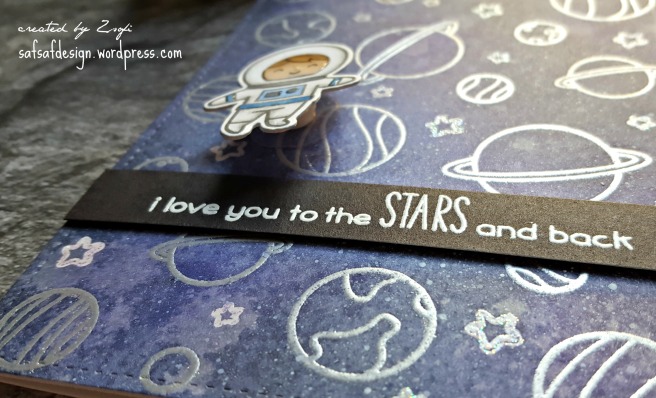
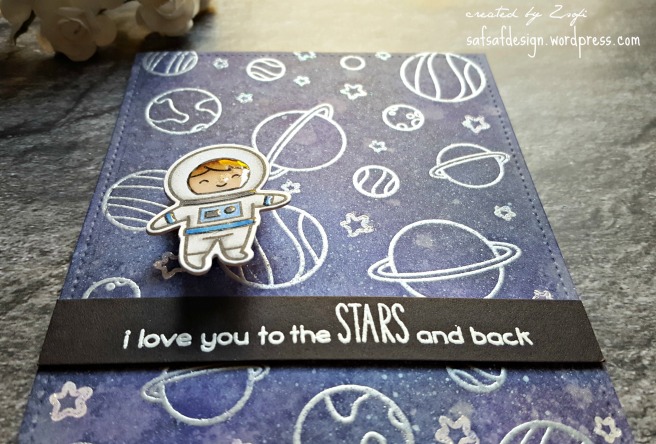
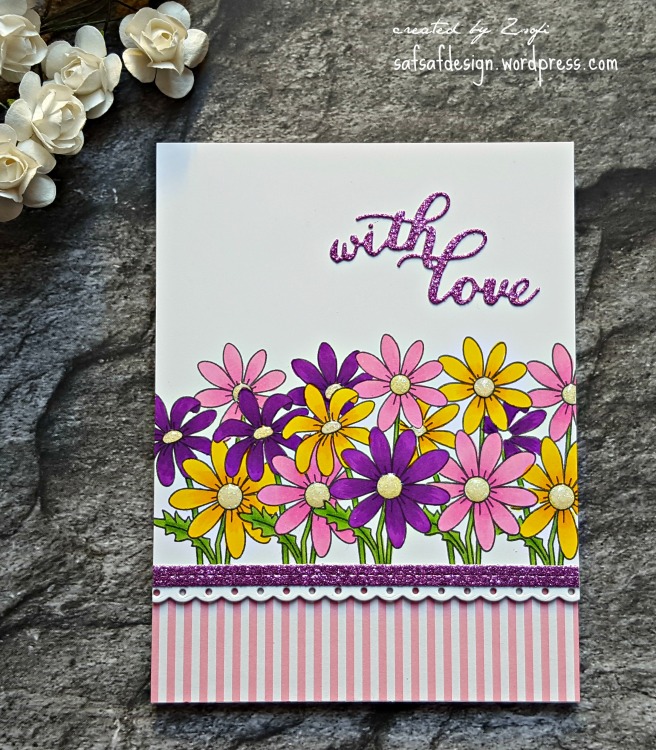
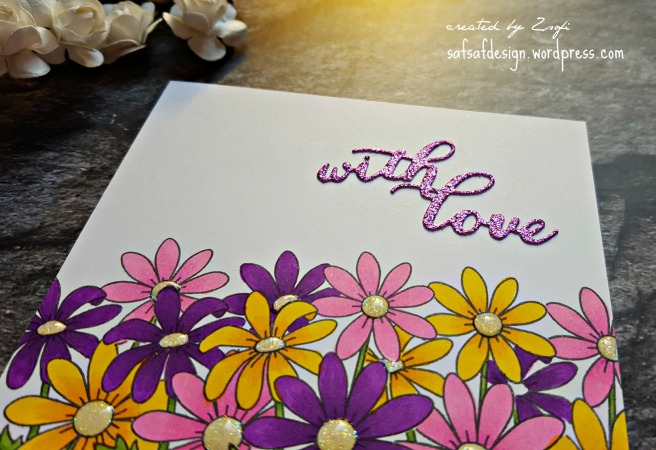
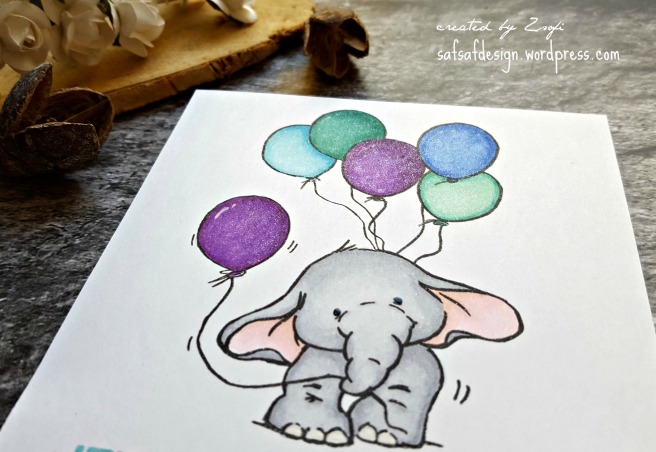
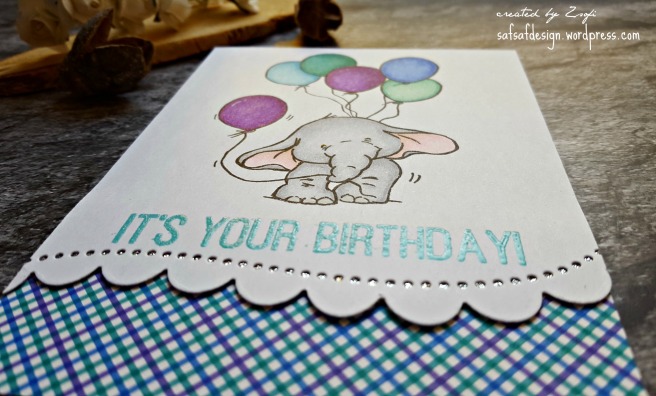
I started with a piece of Bristol Smooth cardstock which I stamped with the delicate tulip from the Beautiful Spring stamp set in Versamark ink and heat embossed in gold, several times until I had to complete rows of tulips. I felt the gold matched the delicacy of the design more than just a pure yellow. I stamped also a Simon Says Stamp sentiment in the middle and also heat embossed it.

20170414_162928 wm

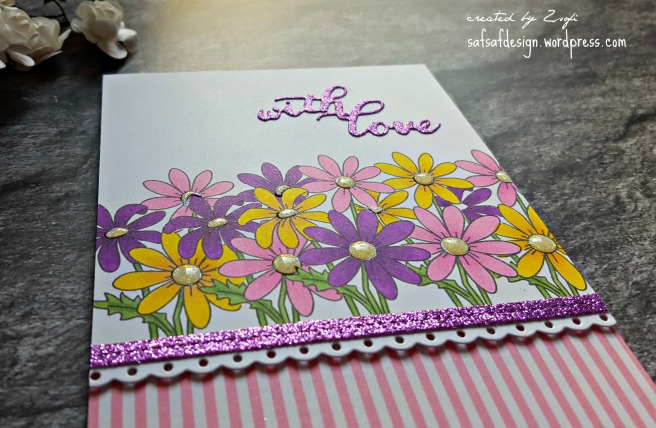
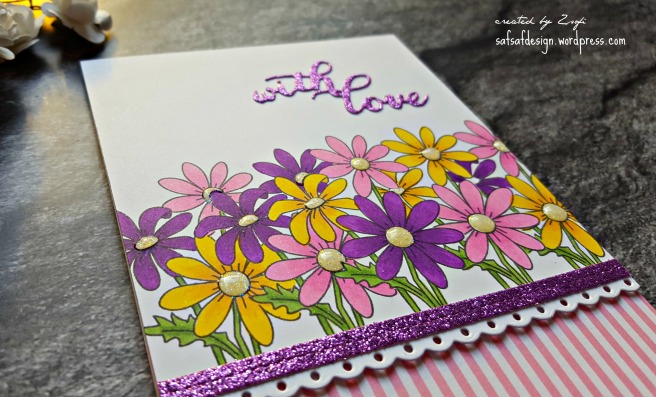
Then I added Distress inks with a mini ink blending tool: Picked Raspberry, Spun Sugar and Wilted Violet. I cut two stitched scalloped borders and two stitched strips (both Lawn Fawn dies) from the same Bristol Smooth cardstock. I applied distress inks on the scalloped pieces directly to the paper, and gold heat embossed the strips. I adhered them all to a white card base.

20170414_162934 wm

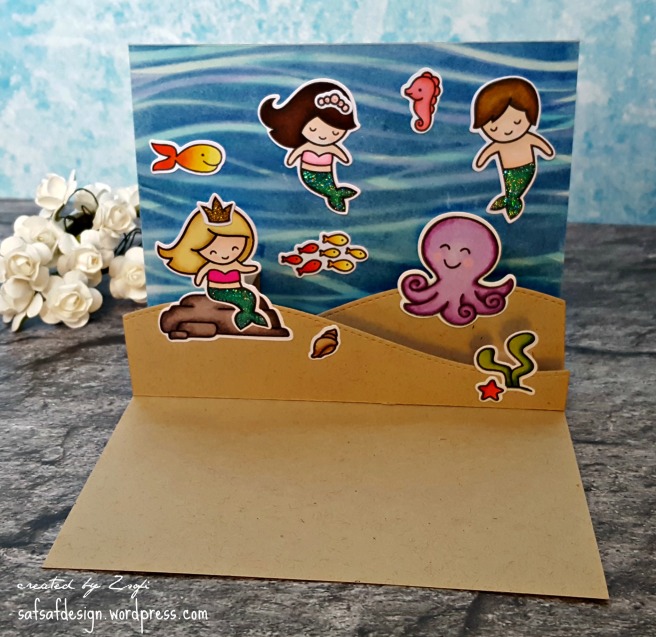
I hope you like my elegant card and will check back later for the promised interactive card.

See you soon,

Zsofi

Easter bunny is back

Hello again,

As I was scrolling my card pictures I found this cutie and realised that I didn’t share it. Easter is on the corner but there is still time to make some quick cards if needed. This one is relatively simple.

20170410_173156 wm

I applied Tumbled glass distress ink on a plain white cardstock just randomly, not spending much time with perfect blending. I die cut it with a scalloped rectangle die from Lawn Fawn and adhered it to a silver metallic A2 sized mat. I cut the grass from patterned paper and ran the same scalloped die on the bottom of it to match the scene.

I stamped the Hungarian Easter sentiment on the upper left corner and silver heat embossed it.

20170410_173206 wm

The images are from a sweet Simon Says Stamp set, stamped on Bristol Smooth cardstock and coloured with Zig clean colour real brush markers. I used the coordinating dies to cut them out. I adhered them flat on the scene except for the bunny which was popped up with 3D foam tape.

20170410_173215 wm

I used a black fine line marker to re-draw the eyes and faces of the critters and added some glossy accents on the yes, paws and the middle of the flowers.

I will submit this card to the Simon Says Stamp Monday Challenge Hip Hop and Wednesday Challenge Spring colours.

See you back here hopefully tomorrow for more bunnies and interaction 😉

Good night,

Zsofi

To the stars – interactive card #2

Hello hello,

Today I brought you a space themed interactive card – I made it for my beloved husband on the day he left for his one month shift at work. It is always a difficult day and these little messages hopefully cheer him up (I also make a card for him each month when he returns home, he has a nice collection already.)

20170411_182027 wm

Back to the card: I started with creating the galaxy background. I silver heat embossed the planets from the Out of this world stamp set on a piece of Bristol Smooth paper I filled the gapes with the tiny stars from the same set, just this time I added iridescent embossing powder to them for that extra sparkle. I didn’t want to go super black and I decided to go with distress inks. I applied some Cracked Pistachio, Wilted Violet and Mermaid Lagoon first with a mini ink blending tool. Then I started to blend in Blueprint sketch and Chipped Sapphire. I added some water sprinkled and dabbed it off with a paper towel. Then another layer of those inks and splatters again. I also used some Black Soot to darken the edges and some parts. When I was happy with the result, I took a Copic opaque white paint and sprinkled some on the background to look like mini stars.

20170411_182117 wm

While it was drying I stamped and coloured (Shinhan markers) the cute astronaut image and cut it with the coordinating die. I cut an extra piece from a scrap white cardstock and adhered it to the back of my coloured one to make it more durable as I wanted to place an action wobble spring on the back of it. Before adhering it to the galaxy background I used the biggest stitched rectangle Lawn Fawn die to add the nice stitching detail to it. Under the wobbling astronaut I used a strip of black cardstock with a heat embossed sentiment on it.

20170411_182044 wm

As a final touch I added some clear shimmer with my Spectrum Noir shimmer pen and glossy accents on the helmet and some details on the uniform.

20170411_182104 wm

Simple design but that action wobble makes it special.

I will submit this to the Lawnfawnatics Challenge #2 Interactive cards.

Lawn Fawnatics Challenge Badge

Hope you like it and will check back soon.

Have a nice evening,

Zsofi

Masked flowers

Good Evening,

I am back with the last post for today, actually it never happened that I posted 3 projects in one day – yay, what a milestone! The card I wanted to show you was made for the current Inky Paws Challenge #44 at Newton’s Nook Designs:

20170412_170043 wm

I started with a piece of Copic friendly cardstock and stamped the pretty flower bouquet from the Garden starter kit in the middle. I prepared a mask from post it note and covered the stamped image with it. Then I stamped the same flowers on both sides. Then I moved the mask and stamped again till the panel was covered totally in width. I coloured with Copic/Shinhan markers (I am new to Copics, just started to build my collection but so far I can say that they work really well together with the Shinhan markers). When the colouring was done I cut the bottom with a pretty border die from Lawn Fawn and added a stitched strip of purple glitter cardstock. The sentiment is from Waffle Flowers, also die cut from the same glitter paper to tie it together.

20170412_170108 wm

I covered the bottom of an A2 top folding notecard with pink and white striped patterned paper and popped up the focal panel with 3D foam tape.

20170412_170204 wm

As a finishing touch I added Star Dust stickles to the middle of the flowers and covered them with glossy accents for the raised look. 

20170412_170101 wm

I hope you like my card and will return tomorrow for another 2 interactive card designs 😉

Sweet dreams to all of you,

Zsofi

More horse love

Hello Again,

I could not stand not sharing this card with you. I made it for a horse-lover friend. Sometimes I really enjoy colouring a bit bigger image, which is time consuming but so relaxing at the same time.

20170325_154813 wm

The image is from Your Next Stamp, coloured with Shinhan markers and embellished with glossy accents.

20170325_154848 wm

I also added some clear shimmer with a Spectrum Noir shimmer pen and some details with a white gel pen. The eyes are emphasized with a black gel pen.

20170325_154902 wm

I die cut the panel with a stitched scalloped border die and added a stitched strip of glitter cardstock. I adhered it with 3D foam tape to a white card base, which I covered previously with patterned paper. I stamped the sentiment on the pattern with black ink. As a final touch, I rounded the corners on the bottom of the card.

20170325_154823 wm

I will submit this to the Simon Says Stamp Wednesday Challenge Happy Birthday.

Hope you like it and will return soon for more inspiration.

See you,

Zsofi

Mermaid birthday – interactive cards #1

Hello Everyone,

I have been working on a few projects therefore the silence here on the blog. Get ready for a lot of card shares today 🙂 The first one is an interactive birthday card, which I made for the best friend of my daughter. I wanted a mermaid themed really special one, so I made a pop-up card.

20170408_183333 wm

20170408_183544 wm

I started with adding different distress inks on Bristol Smooth cardstock. Then I temporarily adhered a waves stencil from SSS and added more ink. I rotated the stencil and added even more ink for more waves. I continued till I was happy with the look. I made 2 of these, one for the outside, one for the inside of the card.

I also stamps a bunch of images from the Mermaid for you and Under the sea stamp sets. Coloured them with Copics/Shinhan markers and die cut them with the coordinating dies.

OUTSIDE

I die cut a stitched hillside border from Neenah Desert Storm cardstock and the happy birthday scripty border die from a purplish blue adhesive cardstock (DCWV). I adhered some of the coloured images and embellished them with Stardust stickles.

20170408_183429 wm

INSIDE

For the inside I adhered the sea background to the top and a Neenah Desert storm piece to the bottom of the card base. I die cut a stitched hillside pop-up panel from the same kraft cardstock and adhered to the scene.

20170408_183615 wm

I embellished with the rest of the coloured images: I glued some on the pop-up element and some to the background. I used the Star dust  and glittery gold stickles here and some glossy accents as well.

20170408_183859 wm

My daughter and her best friend was also very happy with the result, which makes my heart happy too.

I will submit this to the Simon Says Stamp Wednesday Challenge Happy Birthday and to the Lawnfawnatics challenge #2 (Interactive cards).

Lawn Fawnatics Challenge Badge

Hope to see you back soon for the next fun card!

Have a lovely day!

Zsofi


For horse lovers #1

Hello Everyone,

My husband is a horse-addict, he is fond of horse riding. I am therefore always looking for horse stamps and dies. We have had some horse-riding friends celebrating their birthdays recently, here is a card I made for one of them:

20170315_131931 wm

I stamped and coloured that cute Pure Innocence girl with her horse (MFT retired stamp set) using Shinhan alcohol markers and fussy cut it. I adhered a strip of gingham paper on the bottom of a top folding note card and die cut some grass (MFT) and a red strip of cardstock (Lawn Fawn Picket fence die). I die cut a piece of white cardstock with a stitched scalloped die and adhered the grass layers and the red stitched strip.

20170315_131954 wm

I popped up the image with foam tape and stamped the Hungarian sentiment (Happy Birthday) from Krokihobby on the top right corner. I used 3D foam tape to adhere the scalloped panel to the card base too for more dimensions.

20170315_132026 wm

A little Spectrum Noir clear shimmer and some glossy accent to emphasize some details finished it off.

20170315_132012 wm

20170315_132002 wm

I will submit this project to the Simon Says Stamp Wednesday Challenge Happy Birthday.

Hope you like it and will return soon.

See you,

Zsofi

Elephant wishes

Hello everyone,

I am back to Budapest and ready to share a card I have made recently but didn’t have the chance to share. It is a simple design, which can easily be applied for any cute image which takes the centre place of a card.

20170116_142418 wm

I started with stamping and colouring a cute Wild Rose Studio elephant image on alcohol ink friendly paper. I chose a strip of patterned paper for the bottom of my card and used it when choosing my colours. I used Shinhan markers for colouring and Spectrum Noir clear shimmer on the balloons when finished. I also always use a black glaze pen on the eyes and a white gel pen to add tiny details. It makes a big difference.

20170116_142458 wm

I stamped and heat embossed a bigger sentiment (Altenew) in matching  light blue embossing powder.

20170116_142434 wm

Then I die cut it with a scalloped dotted border die, backed the dotted part with silver glitter paper. I mounted it all using 3D foam tape.

20170116_142509 wm

I will submit this to the current Simon Says Stamp Wednesday Challenge Happy Birthday.

I hope you like this card and will pop in again soon.

See you,

Zsofi

Birthday fishes with Lawn Fawn

Hello again,

Iam back with another birthday card for the Lawnfawnatics birthday challenge.

20170327_175034 wm

Making birthday cards which are a bit more masculine or at least neutral is not easy for me, but i always need cards like this in my stash. So i decided to use one of the previously made marbled backgrounds (more details on the technique you can see on Stamp TV, this is where I learnt it from). I die cut it with a stitched rectangle die from Lawn Fawn and cut the Smile die on the bottom of it. I adhered a silver glitter paper to the back of the die cut word and added a dark green mat to the whole panel. I stamped the rest of the sentiment from an older Lawn Fawn mini set under the glittery words.

20170327_175056 wm

I coloured some fish from the Lawn Fawn Tank you stamp set using Shinhan markers and die cut them with the coordinating dies. I glued them to the background and added a few clear droplets from Pretty Pink Posh as bubbles. To make the fish more shiny i covered them with glossy accent.

20170327_175049 wm

I adhered it all to a white card base.

I will link this card up to the Lawnfawnatics Birthday Challenge and to the Simon Says Stamp Wednesday challenge Anything goes.

Lawn Fawnatics Challenge Badge


I hope you got inspired by my card and will return soon.

See you,

Zsofi