Girls just wanna have funds – LDRS Creative

Hello Everyone,

It is my second post for today, if you have missed the previous one, you can click here to see it.

It happens to me often that i don’t have any specific gift idea and i just want to give money to someone. As a cardmaker, i like to give money in a stylish way. So here is my pocket card using an adorable Winnie set from LDRS Creative: Mini Winnie Boutique. I love that it has coordinating dies too!

I started with stamping and colouring the images using alcohol markers. I already decided on the patterned paper i wanted to use so i matched the colours as much as i could. The Holly Jolly holidays paper pad is out of stock right now, but i could imagine this card design with any of the Gnome for Christmas papers too, they are all so gorgeous!

Then i die cut a fancy circle with the Holly Wreath Circle die (which is on sale right now!) from heavy weight white cardstock. I stamped the sentiment from the same stamp set using Scarlet Rose Hybrid ink and arranged the die cut images around it. I used 3D foam squares to add dimension.

I cut the chosen patterned paper to 4,25*5,5 inches and adhered it to a white top folding note card. I adhered the focal panel on this using 3D foam tape and added a bit of clear shimmer to the dress and presents and also a bit of glossy accents to the bow and ribbons.

On the inside, i created a pocket from the remaining patterned paper, which i adhered to the bottom with thin double sided tape. I made sure not to add glue to the top part so i can slip the bank note in easily. I decorated the pocket with a white die cut Christmas and stamped another sentiment from the same stamp set using Scarlet Rose ink.

I hope you enjoyed today’s inspiration. Until next time, happy crafting!

Zsofi
Meowy Christmas with Pink and Main

Hello Everyone,

I must admit 2 things: i am in love with cute critter stamps and i am so behind my holiday cards (can you imagine that i have not sent them out yet???Ahh!) I want to feel that i am not alone with this problem, so i try to design cards which are easy to re-create.

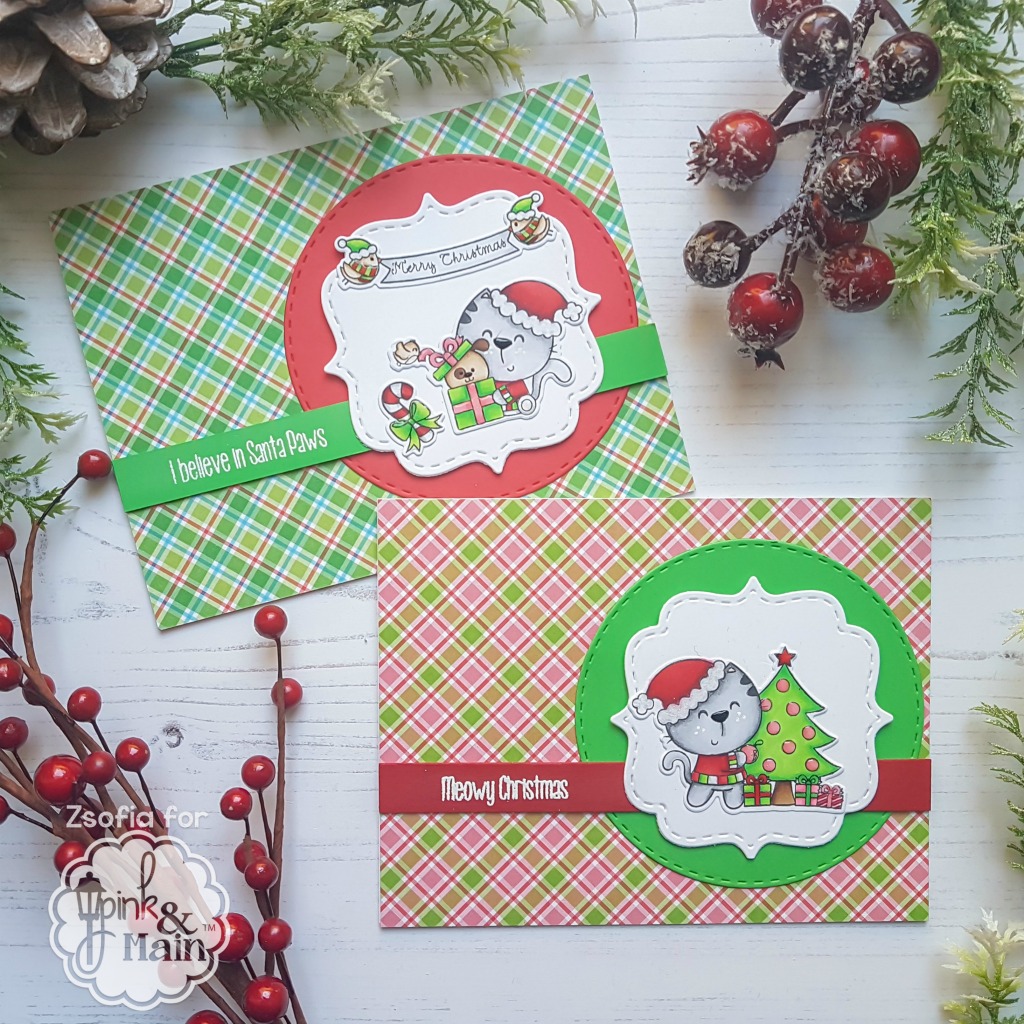
Today i pulled out an older set called Santa Paws. Adorable! I stamped the images on Copic friendly cardstock and coloured them with alcohol inks. I used the coordinating dies to cut them out.

Then i die cut a stitched circle from  red and green cardstocks and also 2 white pieces with a Stitched Top Note die

I white heat embossed 2 of the sentiments from the stamp set on thin strips of red and green cardstocks and layered them over another 2 cardstock strips for a dimensional look. Apart from this my card is pretty flat this time, so it is gonna be easy to mail.

Finally i chose 2 patterned papers from the Jolly paper pad, covered 2 white A2 note cards with them and assembled the card. As a finishing touch i used a bit of clear shimmer, a black glaze pen on the nose, a white gel pen to add dots on the cats’ cheeks and some glossy accents on the presents and ornaments. Colourful, easy and cute – just perfect for the last minute crafters 🙂

I hope you enjoyed today’s inspiration. I have used up a lot of my patterned papers so i am off to the Pink and Main store to replenish my stocks while they have the “Buy one get one free” deal! 

Zsofi

Fawntastic holiday

Hello Everyone,

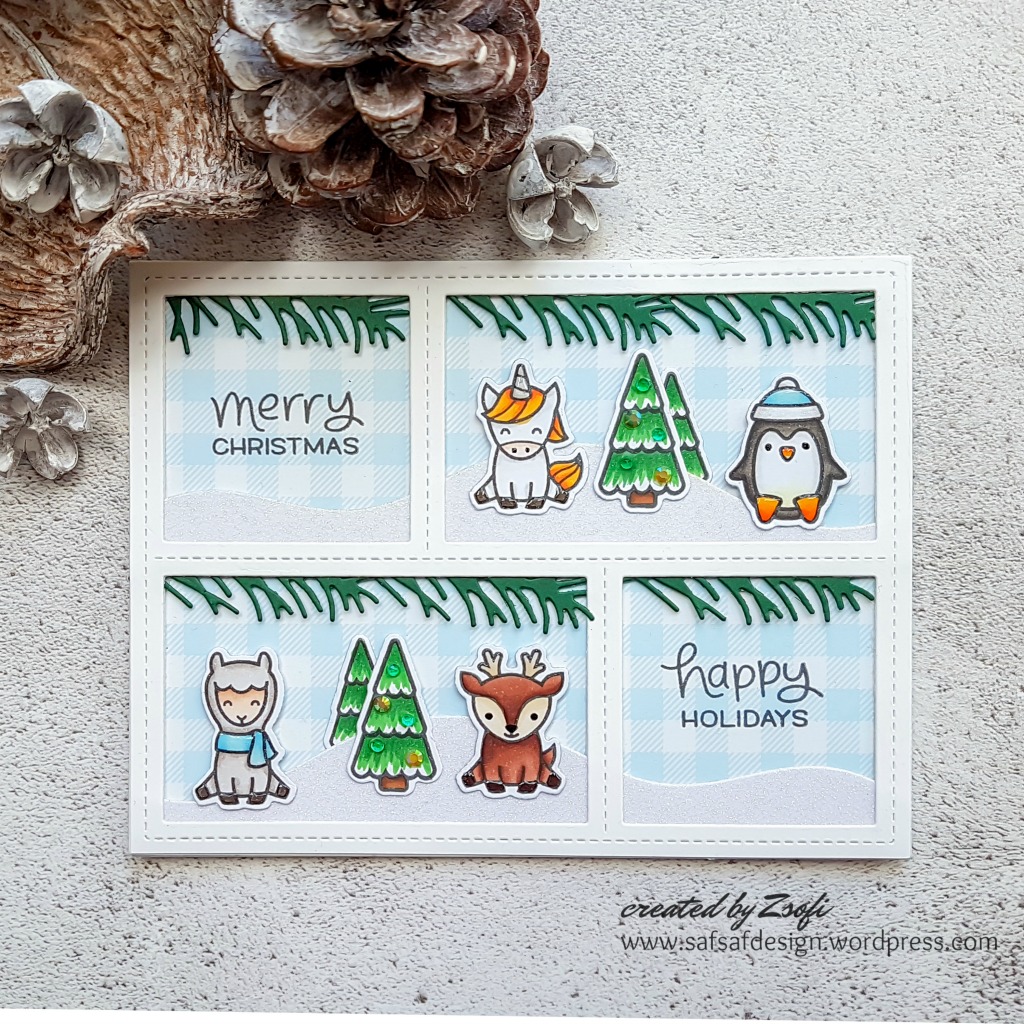
I am back today with a project I made using some gorgeous Lawn Fawn goodies. I just simply adore their style, so no holiday is complete without some Lawn Fawn crafting! I made a card with 2 coordinating tags as I love to match the tags I use on a present with the card I give.

Mona_LF_holiday_Collab_zsm01WM

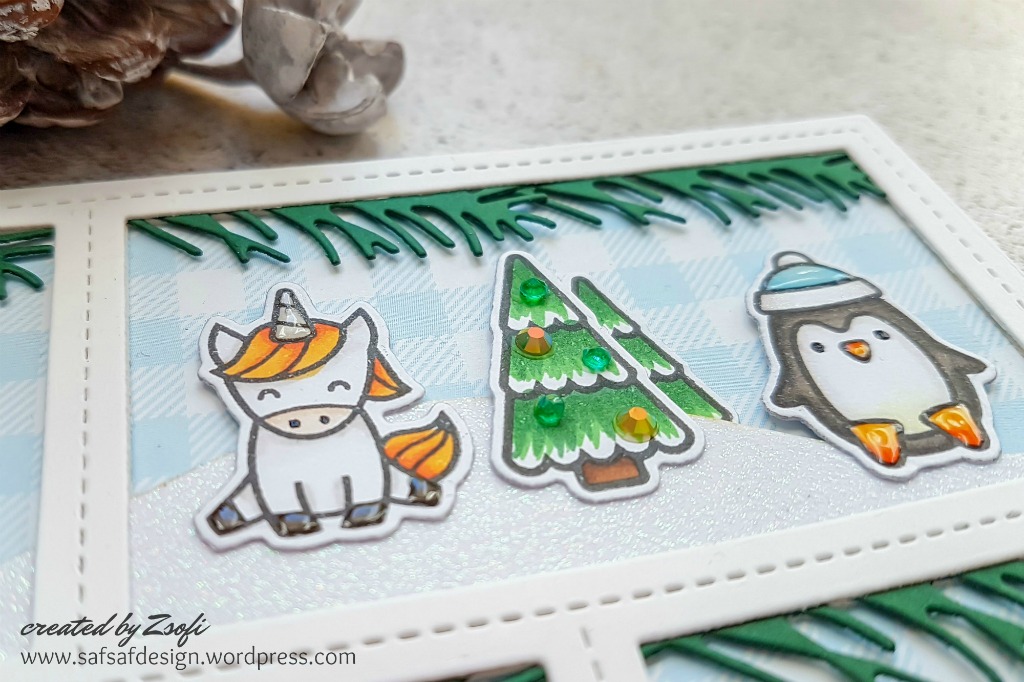
I started with stamping the little critters from the Say what? Christmas critters, coloured them with Copics and die cut them with the coordinating dies. I also added some trees from the Winter skies stamp set as they match perfectly.

LF_holiday collab_zsm05wm

Then I die cut a Peekaboo backdrop frame 2 times from white cardstock and layered them together. I cut some stitched hillside borders (using the negative part of the die cut I got slopes without stitching) from white glitter cardstock and also a few pine leaves with a great die set from Newton’s Nook Designs (Pines and holly).

Mona_LF_holiday_Collab_zsm03WM

When I assembled the card, I placed a blue gingham patterned paper in the background and stamped the sentiments on it with black ink. As a finishing touch I used some clear shimmer pen, a black glaze pen on the eyes and glossy accents to emphasize some details. I also added a few jewels from Lucy’s Little Things to the trees as ornaments.

Mona_LF_holiday_Collab_zsm04WM

For the tags I used the new Say what? Gift tags dies and finished them with white chunky twine from Doodlebug.

Mona_LF_holiday_Collab_zsm02WM

I will link this project to the Lawnfawnatics Challenge #42 Winter holidays and also to Simon Says Stamp Wednesday Challenge Christmas and Monday Challenge Warm winter wishes.

I hope you like my project today and will pop in again soon!

See you,

Zsofi

Nice List with Pink and Main

Hello Everyone,

I had this cute card yesterday on the Pink and Main blog, so I thought I would share it with you here as well. The images in the Nice list stamp set are just adorable, I love this set so much and I see myself re-making this card with even a Hungarian sentiment on it for my friends for Christmas.

I started with a strip of smooth white cardstock which is good for alcohol ink colouring. I stamped Santa and Mrs Santa on the 2 sides an after masking Santa with a post-it mask, I stamped the bag too full of presents. I also stamped the sentiment at this point. Then I used my Copics to add colour, but you can use any colouring medium you prefer if you want to re-make this card.

I used a bit of clear shimmer on the presents and also a Versamark pen on the Santa suits and hats to be able to heat emboss these parts with a White Puff embossing powder. I love the fluffy look, it looks so cozy!

I covered an A2 sized side-folding notecard with red gingham patterned paper from the Jolly paper pad. I matted the coloured piece with silver sparkle cardstock and cut 2 scalloped borders from red cardstock to add it under. I mounted this with 3D foam tape onto the background and finished it off with a bit of glossy accent on the boots and glasses.

I will upload this card to the Simon Says Stamp Monday Challenge Warm Winter Wishes.

I hope you like my card and got inspired! Please make sure to subscribe to my blog in case you like what you see, just to make sure you will not miss any of my inspirational posts. I plan to bring many more holiday cards until Christmas!

Zsofi

Have a Holly Jolly Holiday!

Hello Everyone,

It is my second post today as I was longing to play along the MFT Sketch Challenge #414. It has been a while and I missed using my MFT goodies.

I came up with a design I could multiply – I actually made 4 cards at once, 2 in English and 2 in Hungarian (not on the pics).

MFT_Santa&Friends_zsm01

I started with a stitched rectangle cut from light blue cardstock. I used the Snowfall Background stamp to heat emboss on it with WOW White Puff embossing powder.

MFT_Santa&Friends_zsm05

Then I stamped, coloured and die cut the images. I used Copics and kept it very simple. After die cutting I used an embossing ink pen to cover some parts of the suit and hat with embossing ink and used the same white puff embossing powder to add more texture. I love how it turned out!

MFT_Santa&Friends_zsm03

I also added a piece of blue gingham pattered paper to the bottom, and heat embossed the sentiments on a thin strip of dark grey cardstock with white embossing powder.

MFT_Santa&Friends_zsm04

I assembled the card using liquid glue and mounted it on a white top folding card base.

MFT_Santa&Friends_zsm02

I am so happy with this cheerful design, I hope I can make even more multiples of it before Christmas! I will link this up to the MFT Sketch Challenge.

Hope you like my card and will return tomorrow for some more cuties!

See you,

Zsofi


Last minute holiday crafting with Newton’s Nook Designs

Hello Everyone,

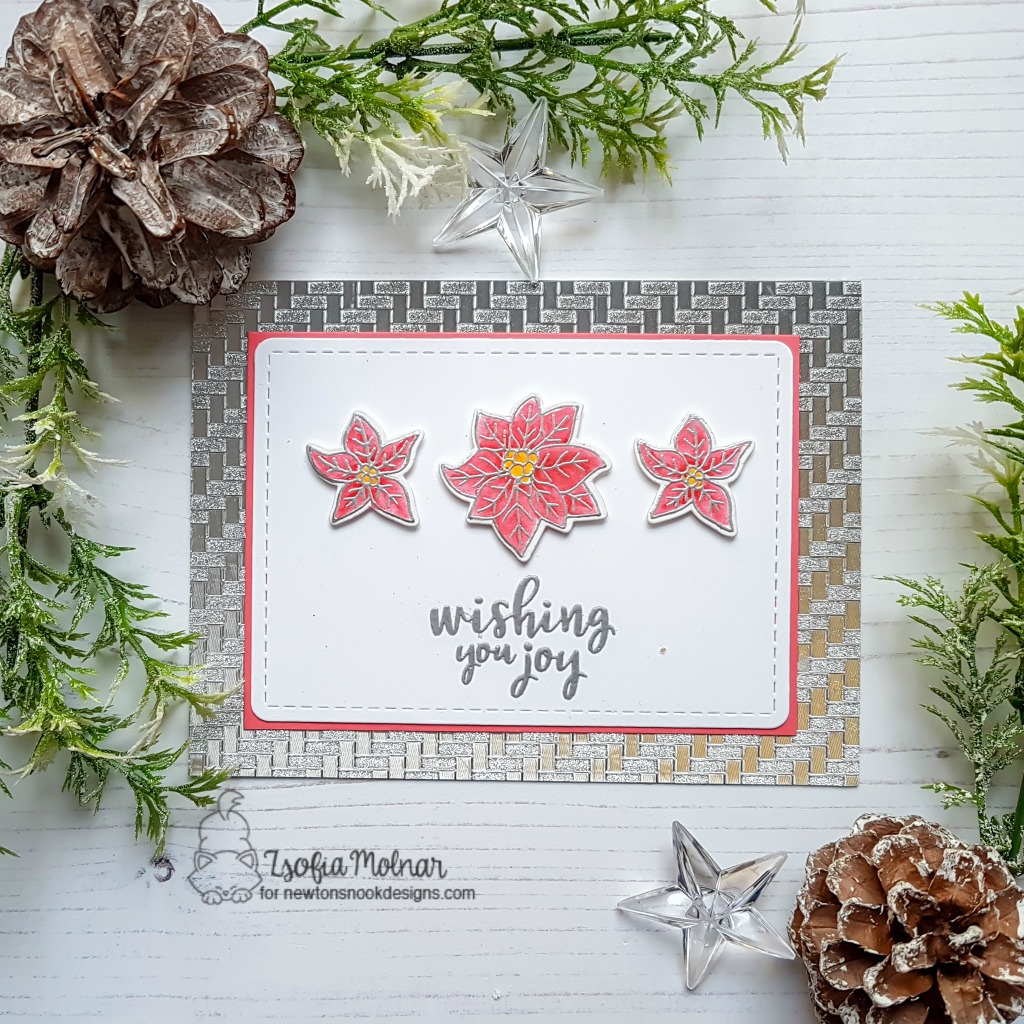
Today I am on the Newton’s Nook Designs blog with a pretty card which is perfect for last minute holiday crafting. I am so behind with my Christmas cards and I really needed a design which is easy to mass produce. So I came up with this:

NND_DecExtra_zsm01IG

I stamped and silver heat embossed a bunch of poinsettia images from the gorgeous Poinsettia Blooms stamp set. I used my Zig Clean Colour Real Brush markers to add a touch of colour and used a clear shimmer pen to move it around. In this way I needed only on shade of each colour and still get the effect of a professionally coloured flower 🙂 I could also vary the colours I used, so even if the design was the same I did not get bored with it.

NND_DecExtra_zsm03_blog

When they were all dry, I used the coordinating dies to cut them out. I also die cut the rounded rectangle from the Frames and Flags die set from a thick white cardstock. I used the sentiments from the Poinsettia Blooms stamp set but you can easily add variation by choosing sentiments from other sets too. I silver heat embossed them on the bottom of the rectangles.

NND_DecExtra_zsm04_blog

NND_DecExtra_zsm06_blog

I used 3D foam squares to add the flowers, 3 on each panel. Then I added a matching thin mat and mounted it on a white card base which I previously covered with some sparkly wrapping paper. I like to recycle my wrapping papers if they are pretty!

NND_DecExtra_zsm05

I will upload this project to the Simon Says Stamp Monday Challenge (Warm Winter Wishes) an Wednesday Challenge (Wrap it up).

I hope you enjoyed today’s projects and will return soon for more inspiration.

See you,

Zsofi

Deck the halls with Inky Paws Blog Hop

DecktheHallsInkyPaws_HOP

Hello Everyone,

I am super excited to be part of the Deck the Halls with Inky Paws Blog Hop this year! I love Newton’s Nook Designs’ products and they have so many holiday themed ones! It is hard to choose, so i decided to use and older set which is new to me: Winston’s Home for Christmas.

NND_DeckTheHallsBH_zsm01IG

For the holidays when i give a present, i love to have a card and a matching tag to put on the wrapped present. When i designed my card, I made sure the design allows me to create a matching tag too.

NND_DeckTheHallsBH_zsm04IG

I started with a piece of Ranger Distress Watercolour cardstock, which i die cut with the scalloped rectangle die from the Frameworks die set and another piece with Fancy Edges tag die. I wanted to do some watercolouring which is totally out of my comfort zone 🙂

NND_DeckTheHallsBH_zsm06

I stamped Winston and a matching sentiment on each panels using a waterproof black ink (my favourite is the Gina K Designs Amalgam ink). The sentiment on the tag is from the gorgeous Sentiments of the Season stamp set.

NND_DeckTheHallsBH_zsm02

I used Altenew watercolours and a waterbrush to colour the images. It looks so dreamy after it got dry, even if i am at the very beginning of my watercolouring journey.

NND_DeckTheHallsBH_zsm05IG

For the card i trimmed a dark red cardstock slightly larger than the scalloped rectangle and mounted it on a pretty patterned paper piece (Doodlebug Milk and Cookies) with 3D foam tape. For the tag i used the same patterned paper and red cardstock to embellish it. I am so happy that the Fancy Edges Tag die set has all sorts of dies to customize your tags. I added a bit of green too to make it really fancy. A piece of chunk red/white twine finished it off. 

NND_DeckTheHallsBH_zsm03IG

I hope you got inspired to make your own Christmas cards with matching tags. And to step out of your comfort zones to have some extra fun!

 Deck the Halls with Inky Paws Exclusive! 

Newton’s Nook Designs is also releasing a NEW mini 2×3 stamp set today called Ginger Snap!! This fun new stamp set will only be available at Newton’s Nook Designs online shop and you can get it for FREE this week with a $30 purchase! Offer is valid until Friday, December 14, 2018 or while supplies last. This new stamp set is also available for purchase for $4.99.

SALE_DeckTheHalls_GingerSnap_1200

Enter to Win! Deck the Halls with Inky Paws Hop Prizes! 

We will be choosing two lucky winners to win a $25 store credit for Newton’s Nook Designs online shop! To enter, just leave comments on the Design Team Member and Guest blogs (see list below)! Two winners will be chosen at random from the collective blogs in the blog hop. Make sure to check out each of their blogs and comment for your chance to win. You will not know which blog has been chosen so the more you comment on the better your chances are of winning! You have until Sunday, December 9th at 9 pm EST to comment — winners will be announced on the NND blog on Monday, December 10th.

Deck the Halls with Inky Paws Blog Hop List:

Newton’s Nook Designs

Keeway Tsao

Alix Davis

Katie Gehring

Caly Person

Amanda Bodine

Holly Endress

Ellen Haxelmans

Larissa Heskett

Samantha Mann

Juliana Michaels

Zsofia Molnar (you are here)

Naki Rager

Maria Russell

Tatiana Trafimovich

Happy hopping and see you soon!
Zsofi

Hot chocolate kind of day!

Hello Everyone,

Iam popping in with a cute snowman card which i made for the Coffee Lovers Blog Hop Fall/Winter.

As Newton’s Nook Designs is a Super Sponsor of this event, i wanted to use this adorable little snowman from the NND Frozen Friends stamp set.

NND_CLBH_zsm01IG

I stamped and coloured the snowman with the mug using Copics and fussy cut the image. I used a black marker to run around the edges and make any kind of imperfection disappear. Then i due cut the scalloped frame from the Frameworks die set several times: a couple from white cardstock and one from dark red. I layered them on top of each other for a chipboard look. 

NND_CLBH_zsm04

On one of the inner pieces i did some Distress Oxide ink blending using Salty Ocean and Tumbled Glass inks. I added some white paint splatters to imitate snowfall. It is a quick and easy way to add an extra touch to your cards. When it was all dry, i stamped the sentiment from the Cup of Cocoa stamp set.

NND_CLBH_zsm02

I used the Landscape border dies to cut a snowy hill from white glitter cardstock and assembled the little scene on a piece of patterned paper from the Doodlebug Milk and Cookies collection. I gae it a light blue mat and adhered it to a white card base. As a finishing touch i used my clear shimmer pen to add some sparkle to the cap and scarf, some glossy accent to the nose and mug and a black glaze pen on the snowman’s eyes.

NND_CLBH_zsm03

I will link this project up to the Coffee Lovers Fall/Winter Blog Hop.

Hope you like my card and will return soon for more inspiration!

See you soon,

Zsofi

Have a lovely Christmas – LDRS Creative

Hello Everyone,

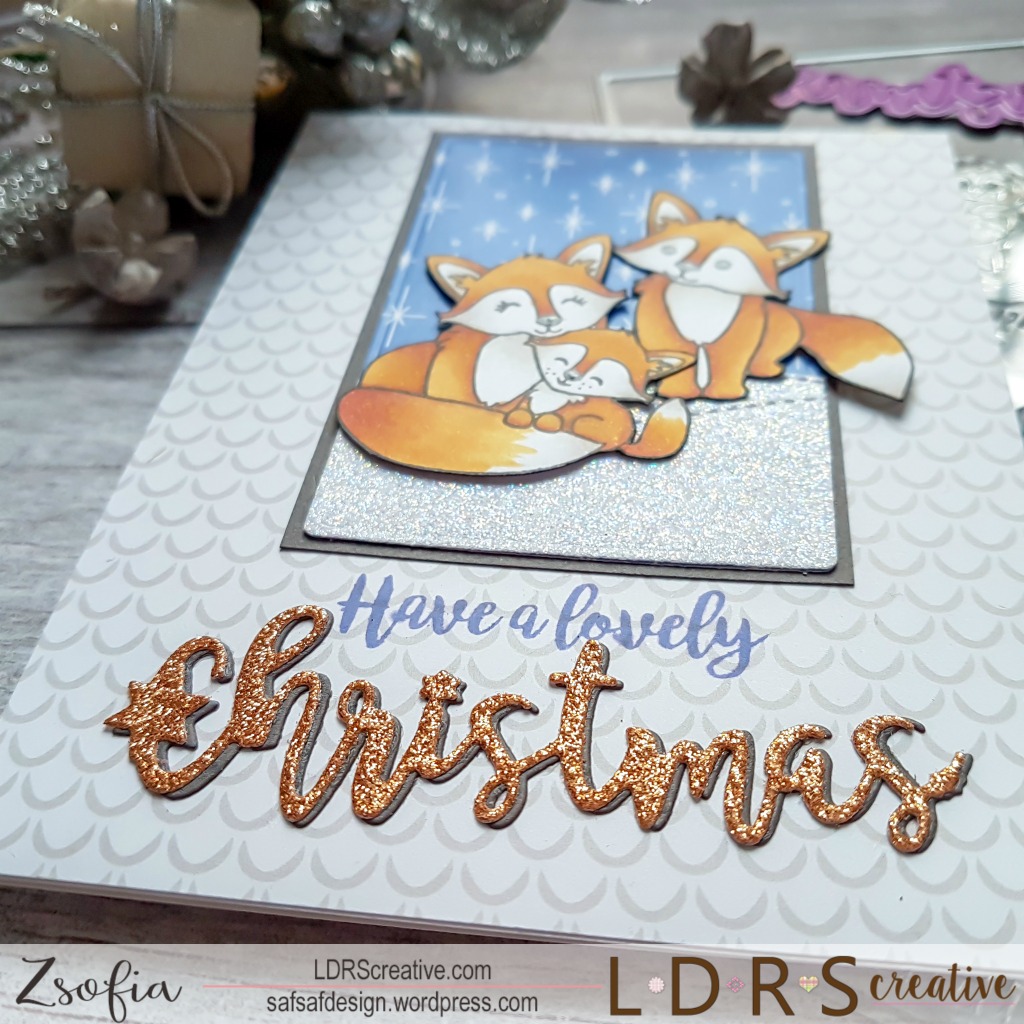
Iam on the LDRS Creative Blog today with a foxy Christmas card. I love to mix and match stamps and dies from my LDRS Creative stash to create a totally new look and use stamps for other occasions than what they were designed for.

ZSOFIA_Safsafdesign2016_ARCTICSNOWFALL1_DEC5

These foxes from the Arctic Snowfall stamp set were begging me to colour them for a while now. I just could not resist any longer, i used my alcohol markers to add colour to them. Then i fussy cut them out with my scissors, and used a black marker on the edges to make any imperfection disappear.

ZSOFIA_Safsafdesign2016_ARCTICSNOWFALL2_DEC5

To set the scene for my fox family, i die cut the rectangle from the Eyelet Lace Rectangle die set from a patterned paper (Arctic Snowfall paper pad) and also from white glitter paper. I used the stitched slope die from the Snowy Day border die set to cut the snowy slopes.

ZSOFIA_Safsafdesign2016_ARCTICSNOWFALL3_DEC5

I cut another patterned paper from the same collection to cover an A2 sized card front and stamped the sentiment from the Love in blooms stamps set using Mrs Periwinkle Hybrid Ink. I love how well it coordinates with the patterned paper i used in the background!

ZSOFIA_Safsafdesign2016_ARCTICSNOWFALL5_DEC5

The other half of the sentiment is a die cut Christmas: i cut it from dark grey cardstock and from glitter cardstock which i layered on top of the grey one a bit offset. I assembled the card and adhered the foxes in place using a thin 3D foam tape. I used a black glaze pen and a white gel pen on the noses and eyes as a finishing touch.

ZSOFIA_Safsafdesign2016_ARCTICSNOWFALL4_DEC5

I will upload this card to the Simon Says Stamp Wednesday Challenge Anything Goes.

I hope you got inspired to stretch your stamps and make holiday cards with them. Until next time, happy crafting!

Zsofi

Java Merry Christmas

Hello Everyone,

I am on the Pink and Main Blog today with a fun Christmas card perfect for coffee lovers!

As Pink and Main is one of the Super Sponsors of the Coffee Lovers Blog Hop, I wanted to use the coffee theme for my post today.

P&M_ChristmasMugs_zsm01IG

I started with stamping and colouring one of the coffee mugs from the Christmas Mugs stamp set along with the candy canes. I used alcohol markers and I die cut the images with the coordinating dies.

P&M_ChristmasMugs_zsm02

I also die cut a green glitter cardstock wreath using the Wreath base die, it looks gorgeous with all the sparkle! I used the same die to cut another wreath from heavy weight vellum to mute the background a bit behind the coffee mug.

P&M_ChristmasMugs_zsm03

I chose a pretty and colourful snowflake patterned paper from the Jolly paper pad, trimmed it a but smaller than an A2 sized card front and adhered it to a dark red card base. I stamped a sentiment in black on the bottom and adhered the wreath with the vellum in the middle. I added the mug in the middle using liquid glue and popped up the candy canes with 3D foam squares.

P&M_ChristmasMugs_zsm04IG

Then I added a bit of sparkle with a clear shimmer pen and used glossy accents on some parts of the images. I love the shiny raised look!

P&M_ChristmasMugs_zsm05

I will upload this card to the Coffee Lovers Blog Hop Fall/Winter and to the Simon Says Stamp Wednesday Challenge Anything goes.

I hope you got inspired to participate in the Blog Hop and to make some coffee themed cards for the holidays. Until next time, happy crafting!

Zsofi