Sea themed card set – Pretty Pink Posh

Hello Everyone,

It is the last day of July and it is time for a goodbye. I have enjoyed so much to be a Guest Designer for Pretty Pink Posh, their designs are adorable and so easy to mix ad match, which is my favourite way of creating. I promise you that I will bring more and more cute scene cards in the future as you love them the most too. For my last post I saved a personal favourite, a sea themed card set. Perfect as home decor too as these are little mixed media arts.

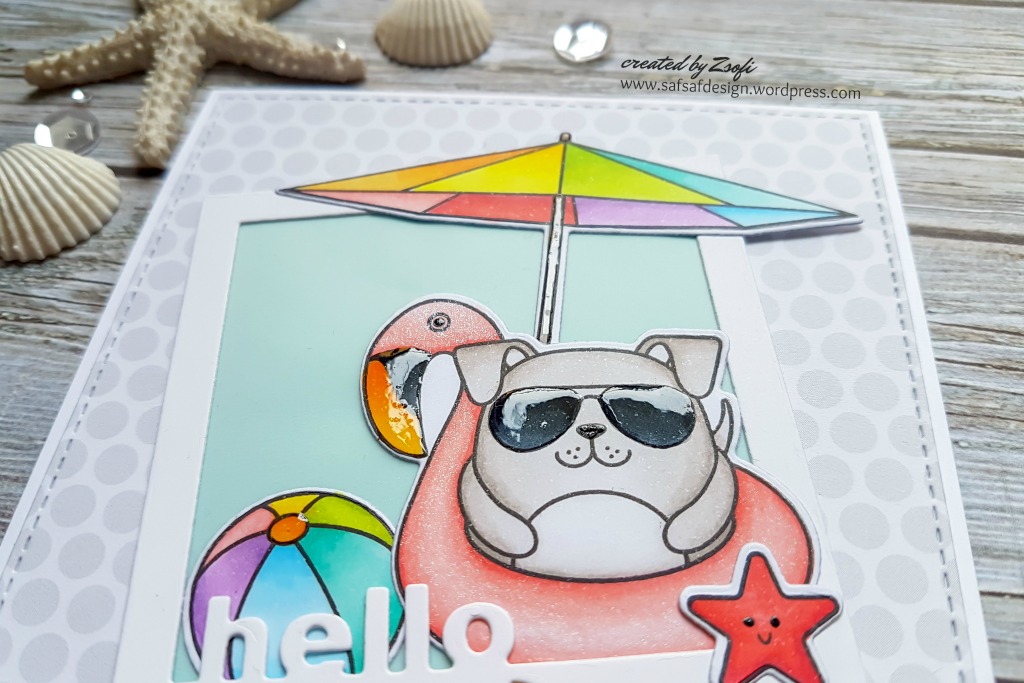
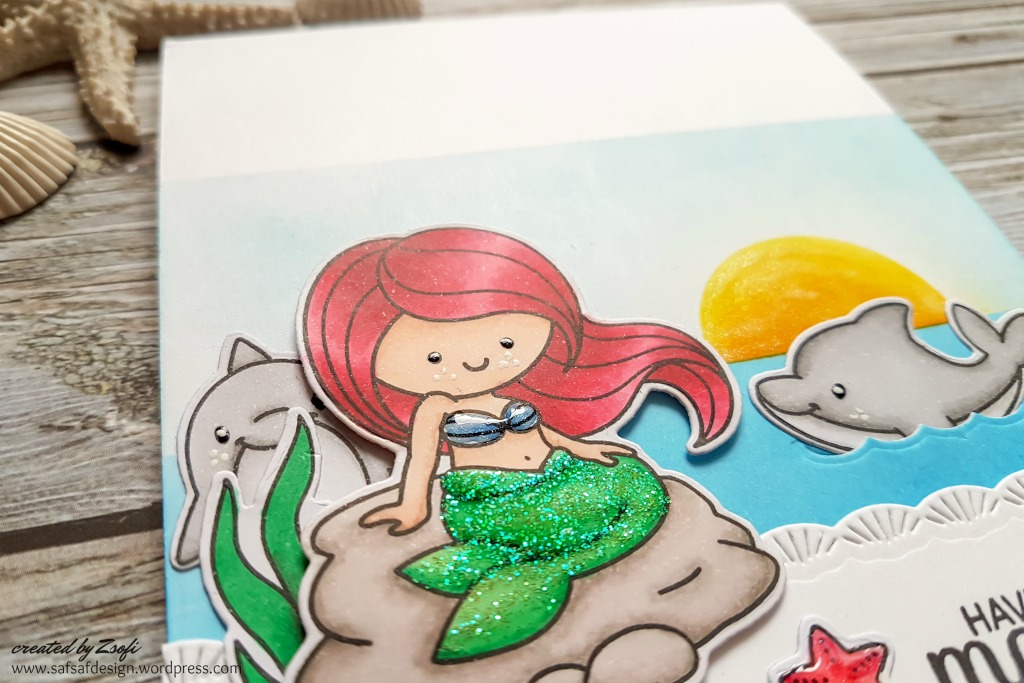
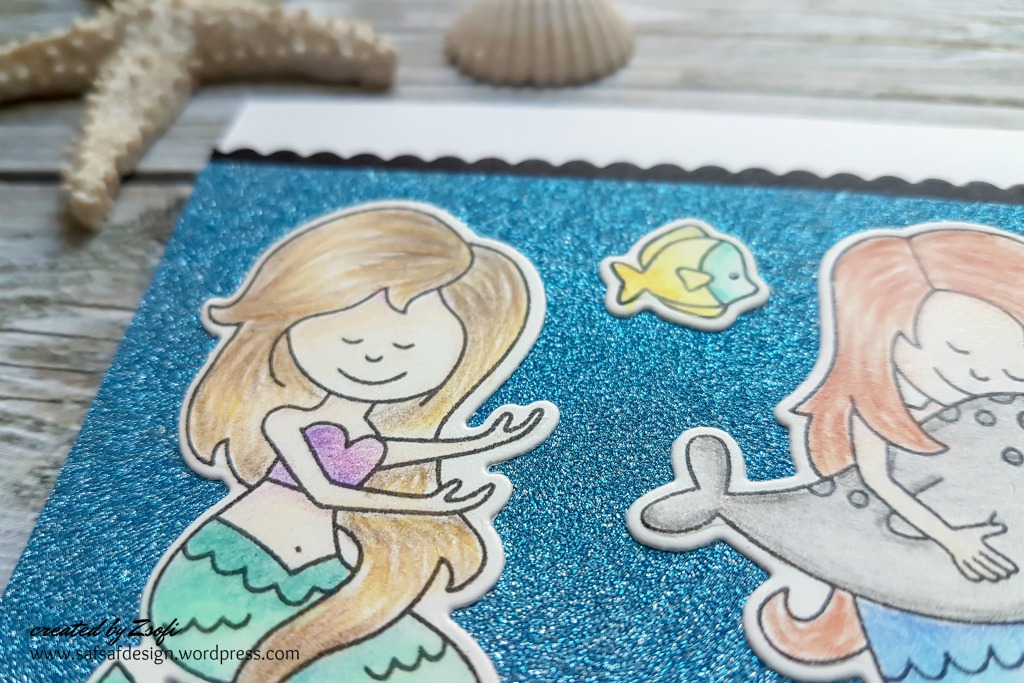
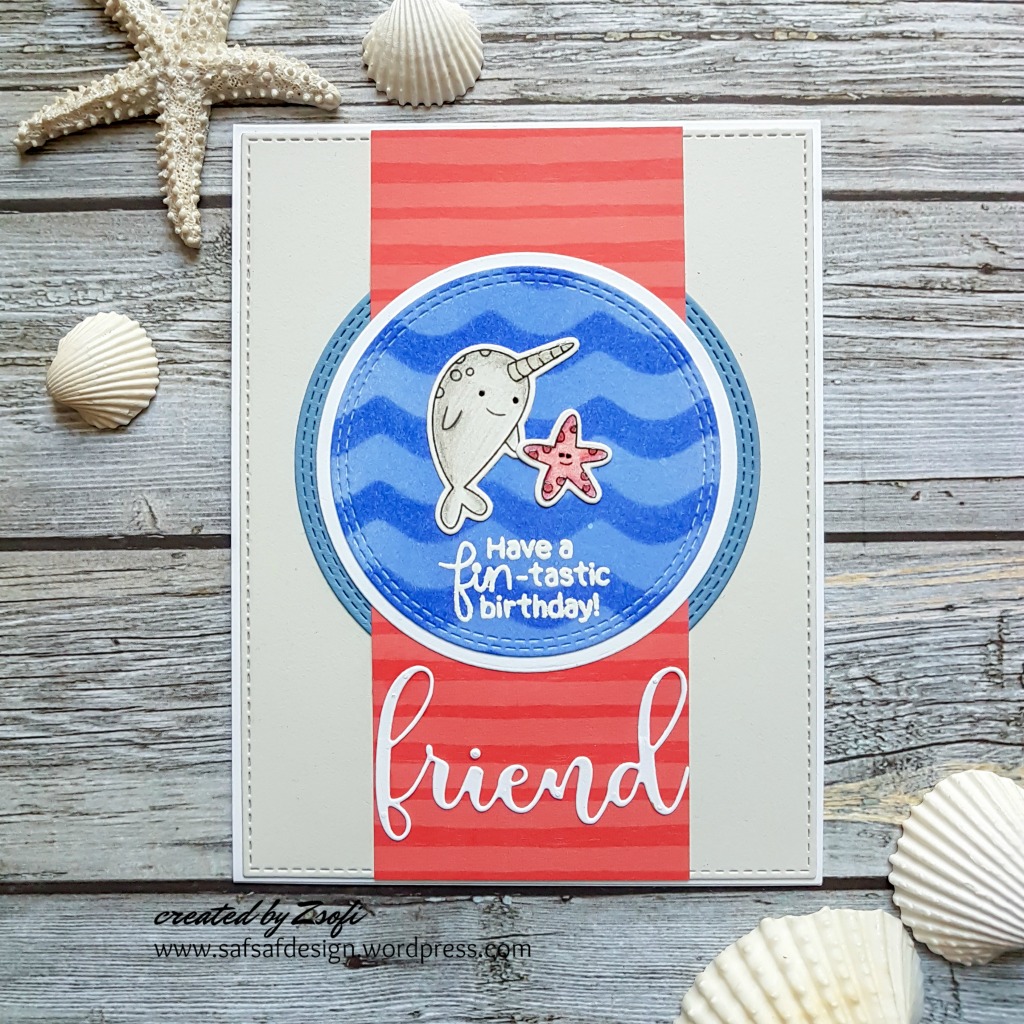
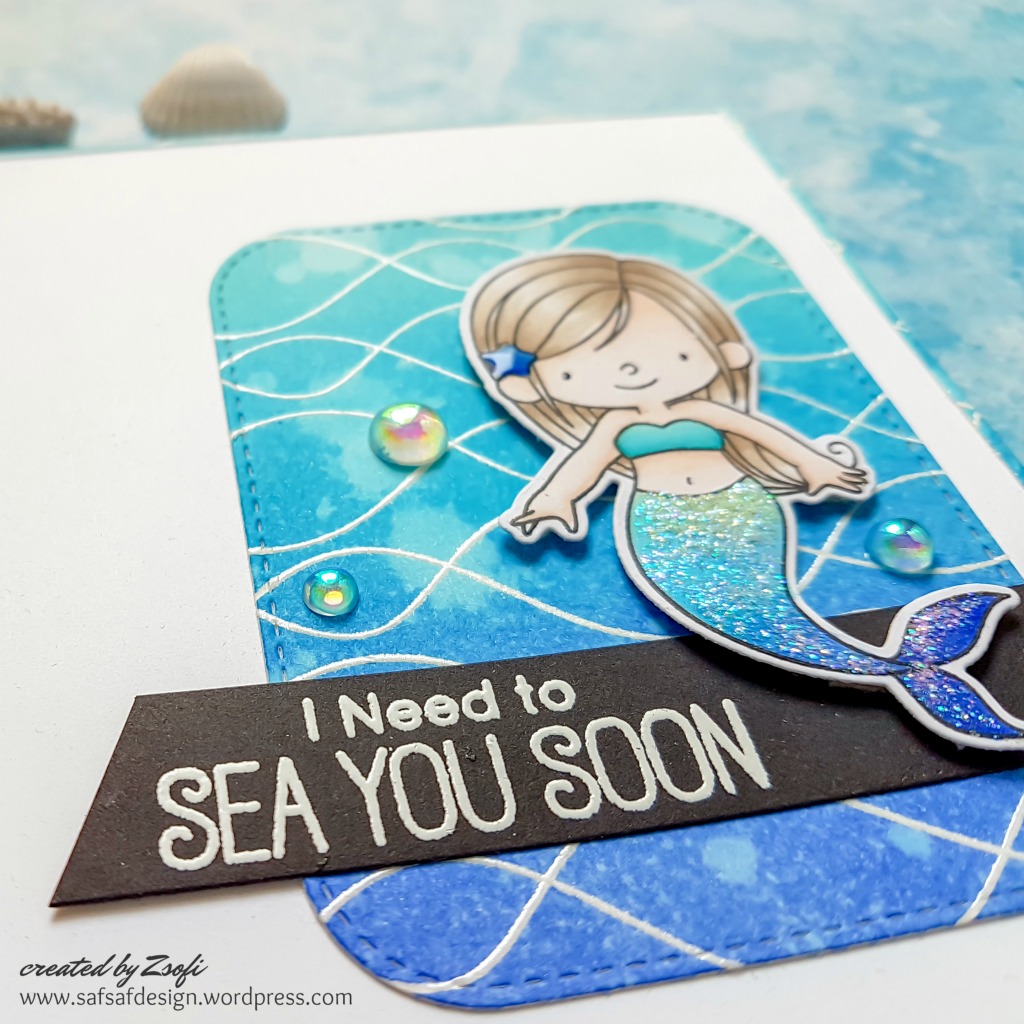
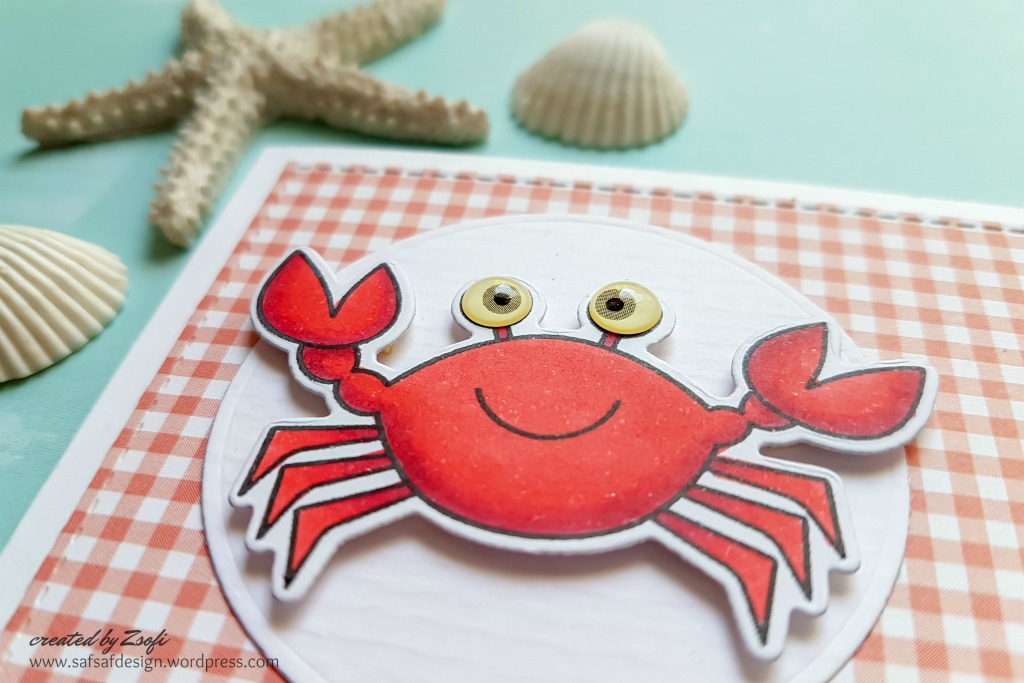
As always I started with stamping and colouring the images from Sea Friends. That is one of my most loved stamp sets. I used Spectrum Noir Illustrator markers:

  • sea horse: BP7, PV4, PV3, PV2, PV1, PV05,
  • dolphin: BT7, BT5, BT2, BT05,
  • fish: JG5, JG4, JG2, AB3, AB1, AB05,
  • other fish: BO4, BO3, BO2, BO1, GY2, CT3, CT1,
  • octopus and coral: PP6, PP4, PP2, PP1
  • crab: DR4, DR2, DR05,
  • shells: GY5, GY2, GY1, GY05, EB4
  • starfish: MG5, MG3, MG1, MG05
  • seaweeds: AG5, LG4, LG2

I added dots to each fish for texture, I love this technique. Then I cut everything out with the coordinating dies.

For the background I used Distress Oxide inks on Bristol Smooth cardstock: Scattered Straw for the sand, Blueprint Sketch, Peacock Feathers and Salty Ocean for the water. I was generous with the splatters: first a spritz of water, which I dabbed off with a dry paper towel after 30 seconds. Then I added diluted ink splatters too. While I was working on the sea, I covered the sand and the other way around. In this way I did not end up with brown splatters in the water.

When the backgrounds were dry, I heat embossed the sentiments from the Everyday Greetings stamp set.

Then I took the Waves stencil and added Gina K Glitz Glitter gel to certain parts, just randomly. I didn’t mind that the paste sipped a bit under the stencil, it just added to the messy ocean look.

I assembled the cards and it was time for the finishing touches: glossy accents on the shells and fins, and black glaze pen on the eyes.

I hope you liked my cards, and will continue to follow my crafty journey.

See you soon,

Zsofi

Retirement Sale Project for Newton’s Nook Designs

Hello Everyone,

It is a bittersweet week at Newton’s Nook Designs as our wonderful team features retiting products for the next couple of days. I have some of my favourites on the list too, which is always sad, but it also means that some lovely new designs are coming soon! YAY! Just stay tuned!

Newton’s Nook Designs is having a retiring sale on their website. These designs are available at up to 40% off while supplies last so hurry to get your favorites before they’re gone for good! 

For my card today I used the beautiful Tropical Fish stencil and the Narly Mermaids stamp/die set. I stamped the images on alcohol ink friendly cardstock with black hybrid ink and coloured the images with Spectrum Noir Illustrator markers.

For the exact colours I made a little chart for you. I used the coordinating dies to cut everything out.

Then I worked on the background: on a piece of Bristol Smooth cardstock I ink blended Wilted Violet, Blueprint Sketch, Salty Ocean and Peacock Feathers Distress Oxide inks. I used a gentle hand and blending brushes for a subtle look. Then I sprinkled it with water, let it sit for 30 sec and dried it with a paper towel.

I secured the stencil with Pixie Spray on the inked background and used the same colours over it just with a heavier hand. Before Removing the stencil I added Moda Scrap Gloss Glitter gel with a Stencil Pal. It gives a wonderful raised and pearlescent look when it is dry! Gorgeous!

While the background was drying I cut a 1,75 * 4,25 inches white strip and stamped 2 sentiments in the middle.

I popped up the narwhal, the star and the mermaid with 3D foam squares and used extra dimension for the shell too. The little fish I adhered with a drop of liquid glue.

As a finishing touch I added glossy accents to the pearl and dot details and used a black glaze pen on the eyes.

I hope you enjoyed my card today. Make sure to check the NND blog daily for more fun projects from my teamies. And don’t forget, if you like any of the products on the retiring list, act fast as when they are gone, they are gone for good!

“Sea you soon”,

Zsofi

Go cray cray! – Heffy Doodle

Hello Everyone,

Welcome to another edition of my Perfect Combos series for Heffy Doodle. For this cheerful slimline birthday card I chose to feature the newly released A Little Shellfish stamp set paired with the current freebie Lil’ Lighthouse along with a new stencil stand alone dies. Let’s dive in the details!

First I stamped the critters in black and used my Copics to bring these cuties alive. Then I used the coordinating dies to cut them all out. When building a scene I alwasy colour more of each image to make sure I have enough to fill the space.

Next I worked on the background: I die cut a stitched rectangle from white cardstock using the new Stitched Slimline Trio dies and blended Tumbled Glass Distress Oxide ink very gently. Then I added clouds using the Head in the clouds stencil and Salty Ocean Distress Oxide ink. Even though the stecil is just 6×6 inches, it was so easy to fill a longer panel.

I also used the Breaking waves border dies to cut 2 long pieces from another white slimline rectangle: as the die gives double stitching I could use both sides to add interest. I blended Blueprint Sketch and Mermaid Lagoon Distress Oxides on both and added some blue splatters and also some sparkly ones using Liquid Stardust from Inkon3.

I needed a little island for the lighthouse and the birthday crab, so I cut a Stitched oval and blended it with Antique Linen Distress Oxide ink. I splattered it with Walnut Stain Oxide ink and white acrylic paint.

Then I assembled the scene alternating 3D foam squares and liquid glue for more dimension.

I heat embossed the sentiment in white on black cardstock and popped it up in the upper left corner. I used the Slimline Pull Tab dies to cut a white scalloped rectagle mat for the whole scene and popped it up on a kraft cardbase measuring 8,5*3,5 inches.

As a finishing touch I used a black glaze pen on the eyes of the critters and glossy accents on the stars, ribbon, party hats and the lighthouse too.

I hope you enjoyed today’s Perfect Combo and will check back later for more inspiration. If you like my cards, please make sure to follow me on Instagram where I share my happy creations! Thank you!

“Sea” you soon,

Zsofi

STAMPtember – last card for the Under the Sea Card Series

undertheseaFB_02

Hello Everyone,

As I mentioned yesterday, despite all the ideas and lovely products I still wanted to use in my card series, I think it is time to focus on fall before the holiday season breaks in 🙂 Today is also the first day of STAMPtember, a month long event created by Simon Says Stamp. It is my favourite crafty event and although I don’t have any of the new Simon release yet, I still wanted to be part of this great happening.

STAMPtember-1080x1080-1-1-735x735.jpg

I have created 2 cards using the Summer Cuddly Critters stamps and coordinating dies. I used Copic markers for the colouring.

UTScardseries_SSS_01IG

CARD #1

UTScardseries_SSS_06

To set the scene for the cute little dog I die cut the Hello Sunshine frame from SSS White cardstock (I love how heavy and smooth this is!). I backed the bottom with a yellow strip and the rest with a light blue cardstock with vellum over it for a subtle look. I love how soft the vellum makes it.

UTScardseries_SSS_08

I arranged the die cut images and adhered them with liquid glue. I die cut a stitched rectangle from a Sunny Studio Polka dot parade paper and adhered it to a white notecard.

UTScardseries_SSS_07

I added some clear shimmer to the floaty with a Tonic Aqua Shimmer pen, and some glossy accents to the sunglasses, rod of the umbrella and beak of the flamingo. I also used a black glaze pen on the nose and eyes.

UTScardseries_SSS_10

CARD #2

UTScardseries_SSS_02IG

For this card I first applied Salty ocean and Blueprint sketch Distress Oxide ink directly to Bristol Smooth cardstock. Then I added clear shimmer paste through the Waves stencil from Newton’s Nook Designs. I set it aside to dry.

UTScardseries_SSS_05

Meanwhile I die cut the Flowing Vine Collage die from a stitched rectangle. I used SSS heavy weight white cardstock again, it cuts beautifully. I added 3D foam tape to the pack of this panel and adhered it to the waves background after it was dry.

UTScardseries_SSS_04

I added the kitty mermaid and also a white heat embossed sentiment on a black strip of cardstock. I did not embellish this card at all, only used a black glaze pen on the nose and eyes and glossy accents on the star and the bra.

UTScardseries_SSS_03

I will upload this project to the Simon Says Stamp Wednesday Challenge Anything goes.

I hope you enjoyed my card series and will keep checking back on me. I also wish you happy crafting this month, I will definitely try to make even more cards than usual 🙂

Thanks for stopping by and see you soon!

Zsofi

Magical birthday – Under the sea Card Series #8

undertheseaFB_02

Hello Everyone,

I am back with a magical birthday card today featuring Clearly Besotted stamps and dies. This is the 8th post in my Under the sea Card series. As August is ending I think it is time to switch to Fall themed cards, so I decided to have only one last post tomorrow (celebrating the month of Stamptember). I had many more stamps, dies, stencils, ideas to make, but the time was too short. At least I will save them for next year 🙂

UTScardseries_CB_01IG

So for today’s card I stamped, coloured and die cut the beyond cute images from Clearly Besotted Fairy tale mermaid an Make a splash sets. I used Copic markers and a black glaze pen to emphasize the eyes and a white gel pen to add some details.

UTScardseries_CB_04

For the background I masked off a strip using Purple tape on a top folding white note card. I sponged the sun first using the Sunscape stencil from Newton’s Nook Designs and Mustard seed and Wild honey distress inks. Then I applied Tumbled glass for the sky. I moved the mask and sponged the sea with Salty ocean distress ink. I used a mini die from the MFT Otterly love you die set to cut a slot for my dolphin.

UTScardseries_CB_03

I also die cut a white strip of cardstock using a pretty border die from Poppy Stamps. I felt it matched the scene so well. I stamped the sentiment in black and arranged the images on the scene. I adhered everything flat except for the mermaid, I popped her up with a thin foam tape (Simon Says Stamp).

UTScardseries_CB_02

As a finishing touch I added Sprinkles to the tale and some glossy accent to the starfish and the bra. I also covered the sun with a layer of clear shimmer using my Tonic Aqua Shimmer pen.

I hope you like today’s inspiration and that you will check back for the last post in this series.

Till then happy crafting,

Zsofi


Let’s be mermaids – Under the sea Card Series #7

undertheseaFB_02

Hello Everyone,

I am sorry for the delay but the last days of the summer break is crazier than I planned. The weather is still warm here and we try to use it to the max with the kids. But I am here now with 2 pencil coloured cards featuring a sweet stamp and die set from Newton’s Nook Designs called Narly Mermaids.

UTScardseries_NND02_01

CARD #1

UTScardseries_NND02_02

I stamped and coloured all the 3 mermaids from the set using coloured pencils (not branded but really good quality from our local discount shop). I could not decide which on to use on the card so I came up with a layout which has room for all the three.

UTScardseries_NND02_04

I simply cut a wide strip of blue glitter cardstock and added a scalloped black border on both sides. I adhered it to a white card base and stamped a sentiment under it with black ink.

UTScardseries_NND02_05

I arranged the mermaids and the tiny fish around them. It was hard not to add anything to the coloured images, but I wanted to keep this card simple.

UTScardseries_NND02_03

CARD #2

I did not plan to make another card for today’s post, but I had the narwhal and the starfish left out from the previous card and they looked too cute together.

UTScardseries_NND02_06IG

I created a distressed-stencilled background for them, cut a double stitched circle and white heat embossed a sentiment on it. I gave it a white circle mat and a blue double stitched on too layering a strip of patterned paper in between.

UTScardseries_NND02_08

I adhered it all to a light grey stitched rectangle and added a die cut friend sentiment under the focal panel. I felt the style of this die (Gina K Design) matched the embossed sentiment so well.

UTScardseries_NND02_09IG

On this card I could not resist and added a bit of sparkle to the background and glossy accent to the horn and the dots on the starfish. A black glaze pen made their eyes pop.

UTScardseries_NND02_07

I hope you like today’s ocean themed inspiration. I plan to continue the series as my time allows as I still have plenty of ideas and stamps I wanted to show you. Let me know in the comments below if you are still interested in mermaids and fishes 🙂

Thanks for your visit and see you soon,

Zsofi

Stencil fun – Under the sea Card Series #6

undertheseaFB_02

Hello Everyone,

Today I brought you a fun stencilled card as #6 in my Under the sea Card Series.

UTScardseries_NND01_01IG

I just love the Tropical fish stencil from Newton’s Nook Designs and wanted to try a fun technique with it. I placed it on white cardstock and mixed some Distress inks with Ranger Transparent Glossy texture paste. I used a spatula to apply it over the stencil making sure that the colours mix with each other. I removed the stencils and washed it immediately under running warm water.

UTScardseries_NND01_03

Until my background was drying I die cut a stitched rectangle and the Celebrate word die (Sugar Pea Designs) 3 times from Blue Violet cardstock. I stacked them together for more dimension using Ranger Multi Matte Medium with a precision tip.

UTScardseries_NND01_02

I also stamped another sentiment from the Sunny Studio Oceans of Joy stamp set on a thin white strip using Blue Violet ink. I gave this an aqua mat to help stand out from the background.

UTScardseries_NND01_04

I assembled the card on a white card base and popped up the sentiment strip with 3D foam squares. I love the shiny finish of those gorgeous fish! Such a unique stencil!

UTScardseries_NND01_06

I hope you like my card and will pop in again tomorrow for 2 more cards featuring Newton’s Nook Designs (shhh…it is gonna be full of mermaids!)

See you,

Zsofi


Swimming by – Under the sea Card Series #5

undertheseaFB_02

Hello Everyone,

I am back today with my 5th post in the Under the sea Card Series, I hope you enjoy this late summer inspiration so far!

UTScardseries_HBS_01IG.jpg

Today’s card features the cute mermaid and turtle from the Swimming by stamp set from Honey Bee Stamps. I stamped them with Onyx Black Versafine ink and heat embossed them with clear embossing powder. I used the coordinating die to cut them out and coloured them with Zig Clean Colour Real Brush Pens. I added some sparkle to the tale with a Tonic Aqua shimmer pen.

UTScardseries_HBS_03

UTScardseries_HBS_04

The background is made on a Bristol Smooth card base using Distress inks (Cracked Pistachio, Peacock Feathers and Blueprint Sketch). After I sponged some on the card base lightly I went back with the same colours through a Cascading Scallop stencil (MFT). I distressed it with water and dabbed it with a paper towel to create texture.

UTScardseries_HBS_05

The sentiment is white heat embossed on black cardstock an die cut with the coordinating die (I love the look). The other half of the sentiment is stamped with Blue Lagoon ink from Gina K Designs.

UTScardseries_HBS_02

I adhered the sentiment an the turtle flat and popped up the mermaid with foam squares. A few clear crystals from Studio Katia finished off this cute card.

UTScardseries_HBS_06

I hope you like my card series and will pop in again soon for more summer fun!

See you,

Zsofi

MFT Summer School – ocean cards

undertheseaFB_02

Hello Everyone,

Welcome to the 4th post in my Under the sea Card Series, which is a long one. I am participating in the MFT Summer School and created all my homework with an ocean theme using several MFT stamps.

Here is a look at all in one (except for the first homework as I blogged about it before).

MFT_Summer_school_allIG

Focal Point

MFT_Summer_school_01

For this card I heat embossed the whimsical waves background stamp with white embossing powder on Bristol Smooth cardstock and blended some Distress inks on it. I spritzed it with water for a distressed look and dabbed it off with a paper towel.

MFT_Summer_school_01a

Then I die cut a rounded stitched rectangle from it and also a skinny frame using a large rectangle die. I adhered both on  a top folding white card base and white heat embossed a sentiment on a black cardstock strip.

MFT_Summer_school_01b

I stamped and coloured with Copics one of the mermaids from the Mermazing stamp set and cut it out with the coordinating die. I added glossy accents to the star in her hair and stardust stickles to her mermaid tail. I mounted her on the background with 3D foam squares and added some iridescent bubbles from Studio Katia as embellishment.

MFT_Summer_school_01c

Visual triangle

MFT_Summer_school_02

I have prepared this card with the MFT Sketch Challenge #399 in mind.

I masked a wide strip on a white card base with masking tape and sponged some Tumbled glass distress ink on it. On a piece of Ranger Watercolour cardstock I sponged Blueprint sketch distress ink and went back with the same colour using the Waves stencil. I love the tone-on-tone look I get this way. I die cut a double stitched circle out of this to be my focal panel.

MFT_Summer_school_02a

I stamped and coloured some fish from the Gill friend stamp set and used the coordinating dies to cut them out. I popped them up on the circle background using 3D foam squares. I added a white heat embossed sentiment on a black strip and used 3D foam tape to adhere it all to the card base.

MFT_Summer_school_02b

A bit of glossy accents on the stripes of the fish and some iridescent bubbles finished off this card.

Ombre

MFT_Summer_school_04

This is my favourite of all, as it is clean and simple (which I always struggle with) yet so impactful.

MFT_Summer_school_04d

I die cut some waves from the Ride the waves (retired) die set from different shades of aqua cardstocks. I adhered them to a white card base leaving a bit of white space in between. I curved a sentiment from the Beach Buds stamp set to fit the upper wave and stamped it in black.

MFT_Summer_school_04b

I stamped and coloured the shark from the same stamp set and used the coordinating die to cut it out. I also die cut a balloon from the Balloon alphabet die set from some specialty cardstock I had in my stash. As it is a very thin paper I backed it with a white die cut balloon. I wanted it to be sturdy enough to tie a thin thread around it. The other part of the thread I tied to the fin of the shark and mounted the image on the card with 3D foam squares.

MFT_Summer_school_04a

I scattered a few Ocean waves crystals from Studio Katia all over the waves and it was all done.

Rainbow

MFT_Summer_school_03

I had an idea of some rainbow fish and the Adorned Ocean friends set was perfect for what I had in mind. I white heat embossed the fish images on Ranger Watercolour cardstock and die cut them with their coordinating dies.

MFT_Summer_school_03cIG

I also heat embossed the Balloon strings background stamp on heavy weight vellum using WOW Seaglass embossing powder and backed it with a light blue cardstock.

MFT_Summer_school_03a

I also die cut 2 white strips using the Sticthed Basic edges 2 die set and adhered it to the vellum from both sides. I stamped the sentiment in black and popped up the 3 fish with 3D foam squares.

MFT_Summer_school_03b

I will upload these projects to the MFT Summer School challenges and to this week’s Sketch Challenge #399 too.

I hope you liked this ocean themed post and my cards made you smile. Till next time, have a wonderful day!

Zsofi

Oh Crab! – Under the sea Card Series #2

undertheseaFB_02

Hello Everyone,

I am back with the second card in my Under the Sea Card Series: a belated funny birthday wish. The layout of this card was inspired by the current Sketch Challenge #398 at MFT. Also it is part of my submissions for the MFT Summer School 2018.

UTScardseries_MFT01_01IG

I stamped, coloured and die cut the bigger crab from the MFT Just Beclaws set. I used Copic markers to add colour to these adorable images.

UTScardseries_MFT01_02

Then I used the MFT Blueprint 22 die set to cut circles from textured white cardstock and the background panel from patterned paper (MFT Tiny check) along with the wavy border which I cut from red cardstock.

UTScardseries_MFT01_03

On the bottom of this I white heat embossed the sentiment and assembled the card on a white card base. I popped up the crabs with 3D foam squares and added funny eerie eyes to both of them (Simon Says Stamp). And my card is finished. I love how a cute image and the Blueprints dies make it easy to whip up a quick but pretty card.

UTScardseries_MFT01_04

I will upload this also to the MFT Summer School Monochromatic Challenge and the MFT Birthday Project Clean and simple too.

I hope you enjoyed my card for today and wish to see you soon for the next one in  the series.

Have a happy day,

Zsofi