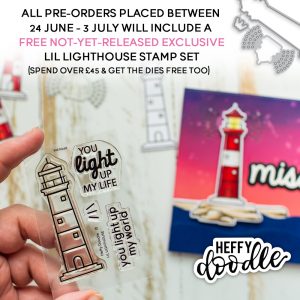
Heffy Doodle and Studio Katia Blog Hop

Hello Everyone,

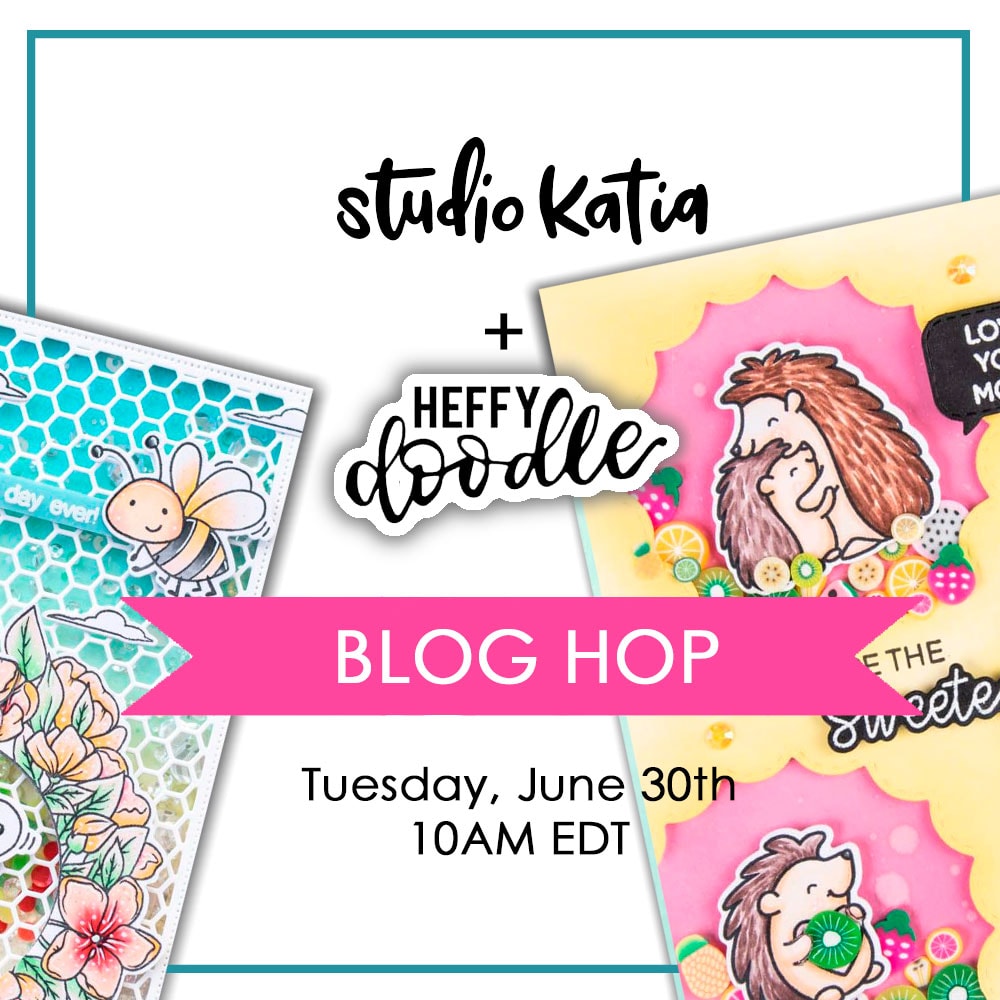
I am thrilled to be part of a wonderful collaboration Blog Hop with two of my favourite companies. Heffy Doodle and Studio Katia have teamed up to bring you a ton of new inspiration. And there are prizes to win! YAY!

I have 2 birthday cards for you today, let’s dive in the details!
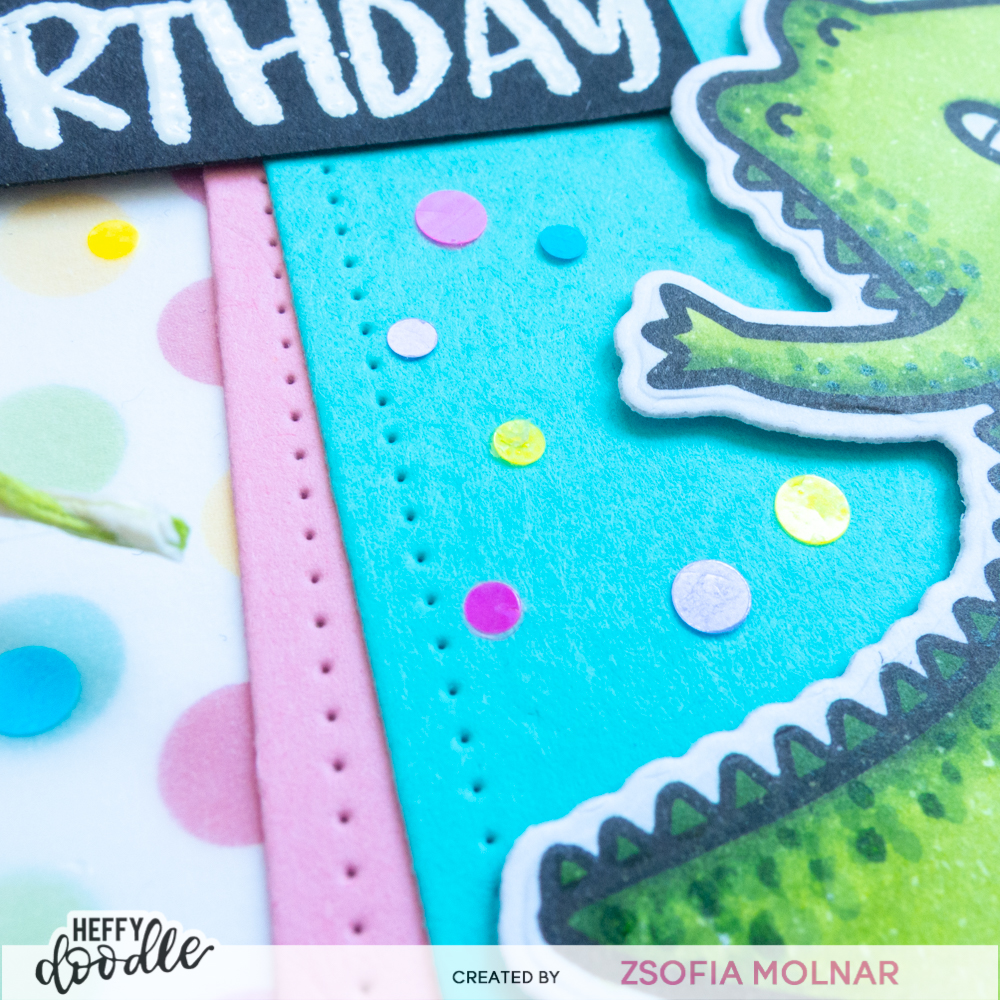
CARD 1

As always I started with stamping and colouring the crocodile from the Happy Snappy Crocs from Heffy Doodle using Copic markers and cut it out with the coordinating die.

I used the Dotted Shaker Tag 2 die from Studio Katia to cut an aqua, yellow and a pink tag. From the yellow one I cut the grass with a Grassy Lass border die from Heffy Doodle. While I was at die cutting I also cut a piece of vellum using the rectangle from Studio Katia Dotted Patterns Set 1.

For the background I chose a dotted patterned paper from Doodlebug Designs and matted it with hot pink cardstock. I assembled the tag as on the picture, used a white eyelet for the top and added green twine to it. I popped up the croc with 3D foam squares and stamped a small sentiment on the very top of the tag from the same stamp set.

The rest of the sentiment I white heat embossed on black cardstock and cut them down to very narrow strips which I adhered hanging off the tag.

I finished the card with a sprinkle of Rainbow Dots Glitter from Studio Katia. It makes it so festive and matches the patterned paper too!

CARD 2

On my second card I went underwater 🙂 I stamped and coloured images from the Heffy Doodle Shellabrate and Oceans of Love sets and used their coordinating dies to cut them out.

I applied Blueprint Sketch and Salty Ocean Distress Oxide inks with a light hand on Bristol Smooth cardstock. Then I used the same coloured just over the Wave to me stencil. I repeated the process after shifting the stencil a bit. This way I got the perfect wavy background which I sprinkled with pearlized water for more texture.

I used the Seashell shaker die from Studio Katia to cut into the background and I also cut another one from blue violet cardstock for the thin frame. I adhered a piece of acetate on the back of the panel to create a shaker window.

I also die cut sand with the Heffy Doodle Stitched Slopey Joes dies and added Antique Linen and Gathered Twigs Distress Oxide inks with a blending brush. I splattered the sand dune with diluted inks and white acrylic paint so it really looks like sand! I stamped a sentiment on the bottom of it from Shellabrate. The rest of the sentiment is from Oceans of Love which I white heat embossed in black cardstock and cut them into very thin strips.

I assembled the scene and added 3D foam strips to the back of it. On a white notecard I sponged a little Salty Ocean Distress Oxide and added some Chunky Dots Glitter and July Crystals and Poseidon Crystals from Studio Katia for the shaker part.

After the shaker was ready I used the same jewels to embellish the front of the card too. I also added glossy accents to the turtles and the starfish and used a black glaze pen on their eyes.

GIVEAWAY

Heffy Doodle will be giving away a  25£ CG and Studio Katia a  25$ CG to their stores. Winners will be chosen randomly and announced on July 7th  on the Heffy Doodle and Studio Katia blogs. Make sure to comment on each stop in the hop to be entered to win! Here is the full list:

Studio Katia Blog

Ashley Ebben

Kaja Vezenšek

Zsofia Molnar – you are here

Galina Filippenko

Cassie Trask

Ilda Dias

Cassie Tezak

Tracy Freeman

Ali Farmer

Tracey McNeely

Amanda Fitterer

Dana Gong

Heffy Doodle Blog

I hope you enjoyed this wonderful hop and got inspired! If you like my cards please subscribe to my blog and follow me on Instagram to make sure you will not miss any project I share! Thank you!

See you soon,

Zsofi

Clean and simple masculine card – Newton’s Nook Designs

Hello Everyone,

I am back today with a really easy to re-make card for Newton’s Nook Designs the most popular Farming Fun stamp and die set. I need to make more of these to enrich my masculine card collection I guess.

As always I started with stamping and colouring the truck and the wagon with Copic markers and cut them out with the coordinating dies.

I used a pretty cloudy backdrop die from Lawn Fawn to create a textured white background and stamped the sentiment on it with black ink.

The bottom third o the card I covered with patterned paper and added a thin strip of dark grey cardstock on the top of it. Then I popped up the coloured images with 3D foam squares,

As a finishing touch I added glossy accents to the middle of the wheels.

You see? I told you it was easy. I cannot wait to see your CAS cards, so please tag me @safsafdesign2016 on IG if you share it there! Thanks for joining me today and hope to see you soon!

Have a great day,

Zsofi

Heffy Doodle July Release – pre-order freebie

This image has an empty alt attribute; its file name is JULY2020release_BANNER.jpg

Hello Everyone,

It is my second post for today as I was longing to share with you this clean and simple card I made with the Lil’ Lighthouse stamps and dies from Heffy Doodle.

If you place a pre-order at the Heffy Doodle store, you get this cute stamp as a freebie. If your order is above Ł45, then you get the coordinating die too. Isn’t it wonderful? Please note that this stamp/die is only an incentive and will NOT BE SOLD in the shop!

For my project I stamped and coloured the lighthouse using Copic markers and cut it out with the coordinating die.

On a piece of white cardstock I used the … stencil and quickly blended some Salty Ocean Distress Oxide ink making it lighter in the middle of the circle. I added a tiny bit of Hickory Smoke Distress Oxide on the bottom. Before popping up the lighthouse with 3D foam squares, I used that extra die in the coordinating die set to add the little holes for the light. I backed the panel with gold glitter cardstock, it looks like light in real life!

I die cut the Thinking of you from white cardstock 3 times and layered them on top of each other.

I cut the shadow from black cardstock. Before adhering it to the card, I randomly applied the remaining blue ink from my blending brush over the sentiment.

I finished the card with a bit of glossy accents on the darker grey parts of the lighthouse. I love how this card is perfect for guys too!

I hope you enjoyed this extra project for Release week. Pre-orders are open and the whole new release will go live on 3rd July. We will have a celebration on that day, so look out for more info on social media!

See you soon,

Zsofi

Floral birthday and Farewell – Pink and Main

Hello Everyone,

Iam back today with a bright and cheerful floral birthday card using some older goodies from Pink and Main. It is my last post for them as a Design Team member, but I am sure you will still see me using their stamps/dies and stencils as I love what they have! But enough of goodbyes, let’s dive in the card details.

I stamped and coloued some of the pretty bouquets from Gorgeous Vases using my Copic markers. I kept the colours the same: pink, orange and light blue. I used the coordinating dies to cut them all out.

I used the vase dies to cut some patterned paper from the Pastel Dreams paper pad. I made them sturdier by cutting them also from white cardstock and layering the patterned vases on top of these. I arranged my flowers on a 4,25*4,25 inches white piece of cardstock using 3D foam squares to achieve a dimensional look.

I really love the Vertical greetings stamp set but I could not decide which sentiment to use. So I chose 3 and stamped them on coloured cardstock. I adhered them on top of each other so only the sentiment shows. Isn’t it a unique design? And so easy!

As embellishment I added glossy accents to the flower centers and my card is all done! I can imagine this design with different colour combos. So versatile!

I hope you enjoyed my card today and all my previous Pink and Main projects. See you soon with more cheerful cards!

Big hugs,

Zsofi

Heffy Doodle July Release – Reveal Day 4

This image has an empty alt attribute; its file name is JULY2020release_BANNER.jpg

Hello Everyone,

It is the last day of the July Release reveals at Heffy Doodle, for all the information and product close-ups, please visit the Heffy Doodle blog. Pre-orders are now open and the whole new release will be available on 03/07! There is a gorgeous freebie with every pre-order!

This image has an empty alt attribute; its file name is LILLIGHTHOUSE_PREORDER_SQ-300x300.jpg

For today’s post I was playing with the new Head in the clouds stencil.

I applied Spun Sugar Distress Oxide ink with an ink blencing brush then shifted the stencil and repeated I with Picked Raspberry. I shifted it again and finished the background with Shaded Lilac. I cut the panel down with a Stitched rectangle die and matted it with Lavender cardstock.

I had a Fluffy Puffy Unicorn coloured and die cut with its coordinating die which I popped up with 3D foam squares on a vellum circle. I used the Skinny Circle frames dies to cut a light and a dark pink frame to embellish the vellum and to hide the adhesive under them.

The sentiment is die cut with the new Miss you – Shadow Heffy cuts die from Lavender cardstock 3 times and layered on top of each other. The shadow I cut from white cardstock.

To finish the card I added some clear stars from Studio Katia and covered the hair of the unicorn and the Miss you sentiment with a clear shimmer pen.

I hope you enjoyed the July Reveals and you are ready to shop! I will be back tomorrow with one last card for Release week, are you curious which set I am gonna show you?

See you,

Zsofi

Heffy Doodle July Release – Reveal Day 3

This image has an empty alt attribute; its file name is JULY2020release_BANNER.jpg

Hello Everyone,

It is Day 3 of the July Release reveals at Heffy Doodle, for all the information and product close-ups, please visit the Heffy Doodle blog. Pre-orders open on 24/06 and the whole new release will be available on 03/07! There is a gorgeous freebie with every pre-order!

This image has an empty alt attribute; its file name is LILLIGHTHOUSE_PREORDER_SQ-300x300.jpg

For today’s post I was playing with the 2 slimline die sets: Stitched Slimline Trio and Slimline Pull Tab dies and the most adorable Fluffy Puffy Unicorns stamp and die set.

I started with stamping the cute unicorns, the rainbows and the clouds with black ink onto Copic friendly white cardstock. I used aqua, blue and purple shades to colour their hair and used the same colours for the rainbows too.

I love to restrict my colour palette to a few colours only so I can give my whole scene a united look. I die cut everything with the coordinating dies.

I wanted to keep the card simple, but to have a lot of dimension I die cut the different slimline dies from different coloured cardstock. I also used the scalloped slimline die for a final mat. I created my own cardbase from dark grey cardstock – I cut an 8,5*7 inches piece and scored it in the middle.

I stamped a sentiment with purple ink directly on the white stitched slimline rectangle and popped up the unicorns with 3D foam squares. The clouds and rainbows I adhered flat behind them.

As a finishing touch I added some tiny sequins from Studio Katia, covered the rainbows with a clear shimmer pen and used glossy accents on the horns.

I love how clean and simple it is yet so super cute! It would make anyone smile!

I hope you enjoyed today’s inspiration and will pop in tomorrow again for the last day of the July reveals.

See you,

Zsofi

Heffy Doodle July Release – Reveal Day 2

This image has an empty alt attribute; its file name is JULY2020release_BANNER.jpg

Hello Everyone,

We continue with more product reveals at Heffy Doodle, for all the information and product close-ups, please visit the Heffy Doodle blog. Pre-orders open on 24/06 and the whole new release will be available on 03/07! There is a gorgeous freebie with every pre-order!

I created a fun, summery Miss you card, with the You go. gull stamp/die set ad the Close at heart stamp set. As always I staretd with stamping and colouring the images with Copic markers and cut them out with their coordinating dies.

On a white piece of cardstock I used the Candy store stencil with Brilliant Blue Glitzy Glitter gel from Thermoweb. While it was drying I worked on the little scene.

I die cut the base from Tag along from Bristol Smooth cardstock and used the Stormy seas stencil to add waves to the bottom of it with Salty Ocean and Blueprint Sketch Distress Oxide inks. Before removing the stencil I added some diluted ink and water splatters to create texture. For the sky I used the new Speckled Egg Distress Oxide.

I die cut the frame tag 3 times from white cardstock and layered them on the background tag. I popped up the images with 3D foam squares and embellished the tag with a funky orange ribbon.

Part of the sentiment I stamped on the paper the seagulls are holding but I wanted to combine it with another one from the Close at heart stamp set. I white heat embossed it on black cardstock and cut it out with a banner die from Tag along. I had to make the tag longer, but it is easy with the partial die cutting technique.

After assembling the card I added glossy accents to the beaks of the birds and to the bottle too. I love the shine!

I hope you enjoyed today’s inspiration and you will come back tomorrow for another cutie!

See you,

Zsofi

Heffy Doodle July Release – Reveal Day 1

Hello Everyone,

I have fantastic news! Heffy Doodle is also coming out with fabulous new products! You may have seen some sneak peeks over at the Heffy Doodle blog in the last few days, but starting from today I am sharing with you some fun inspiration too.

My card today features the new Sealy friends stamp and die set. I stamped the images with Lawn Fawn Crunchy Leaf ink and coloured them with Copic markers. I love that using brown ink gives a totally different look to these cute critters! I added some dots to the seals with my Copics and also with a white gel pen for more texture.

Then I die cut them all with their coordinating dies. I love that the dies cut around the “arms” too, so they can hold anything! So fun!

I also stamped a few fish and some accessories to help me building the scene. I kept the colours simple.

For the background I sponged some Squeezed Lemonade Distress Oxide ink on Bristol Smooth cardstock and applied Mustard Seed Distress Oxide ink over the Rays of the roof stencil. Before removing the stencil I sprayed it with Tsukineko Shimmer Spritz for a subtle sparkle. On the bottom of the panel I added a bit of Peacock Feathers Distress Oxide ink. I used a Stitched Oval die to cut out a piece from this.

Then I used the new Breaking waves dies to cut 2 ocean waves from Bristol Smooth cardstock and blended Peacock Feathers and Blueprint Sketch Distress Oxide inks on both. I added texture with some water droplets and splattered diluted Blueprint Sketch ink along with some white watercolour paint.

I used another die from Breaking waves to cut a heavy weight vellum for the ice. The sentiment I white heat embossed partially on a thin black cardstock strip and the other half on the first wave. I assembled the card, embellished it with some Studio Katia Icy Sparkle Crystals and added some glossy accents to the pearl and the heart. A bit of black glaze pen on the eyes finished it off. Isn’t it perfect for a summer birthday? Or any occasion which is worth celebrating.

I hope you enjoyed today’s project and you will return tomorrow for more fun! The pre-orders of the new release products will start on 24/06 and the whole new release will go live on 03/07! Check the Heffy Doodle blog for more details.

See you,

Zsofi

Newton’s Nook Designs June Release – DAY 4

Hello Everyone,

It is the final day of the June release reveals at Newton’s Nook Designs. Today we have 2 smaller sets to show you: the super cute Porch Swing Friends and the beautiful Roses set. Both of them come with coordinating dies! All new products will be available on Friday 19th June 2020!

CARD 1

For my first card I started stamping and colouring the Porch Bench Friends using my Copic markers. I used neutral colours for the animals and went really bright with the pillows. I cut them all with their coordinating dies. After die cutting I used a BG11 Copic marker to colour the white parts of the image so it would sink in the background more.

To set the scene I needed some trees which I cut from woodgrain cardstock with the Forest scene builder dies and the canopy which I cut using the Sky border dies. I used Distress Oxide inks to add some colour to these and I added some splatters too for more texture.

On an A2 sized card base I sponged the new Speckled Egg Distress Oxide ink (ahh so pretty!) and added some splatters from the same colour and white watercolour. I also added some droplets from a clear shimmer mist.

When assembling the scene I used 3D foam squares for the canopy and the coloured image, the tree trunks I adhered flat. The sentiment is die cut 2 times from white cardstock and once from a velvet red one and layered on top of each other. I love that the Porch Swing Friends coordinating die has this extra sentiment!

I made the critters noses shiny with glossy accents and added a bit of clear shimmer to the red parts of the accessories. Oh how I wish to relax on a swing like this!

CARD 2

I have recently surprised myself with a big set of Karin Brush markers. These are water based markers with really intense pigments in them and I felt the Roses stamp would be the prefect one to try them on.

I heat embossed the image on Ranger watercolour cardstock using Hero Arts black sparkle embossing powder. Then I added a tiny drop of colour from the markers and moved it with a waterbrush. The colours are amazing and so bright! I used only one pink and one green marker! When it was dry I cut it out with the coordinating dies.

I also cut some rounded stitched rectangles using Frames squared and patterned papers. I layered them on top of each other at an angle on a top folding white card base.

I used a small rectangle from the Slimline Frames and Windows die to hold my roses and added a white heat embossed sentiment on a black strip of cardstock to it. The card base this time is 4,25 x 4,25 inches.

GIVEAWAY

Would you like to win the “Roses” or the “Porch Swing Friends”  stamp set? We will choose ONE lucky winner for each stamp set! Here’s how to win: comment on the NND blog and Design Team blogs (see list below)! Thewinner will be chosen at random from the collective reveal posts. Make sure to check out each of their blogs and comment for your chance to win. You will not know which blog has been chosen so the more you comment on the better your chances are of winning! You have until Thursday June 18th at 9pm EST to comment  — winners will be announced on the blog post on Friday, June 19th. 

Check out all the awesome Design Team Blogs below to enter:

Newton’s Nook Designs

Ellen Haxelmans

Larissa Heskett

Samantha Mann

Zsofia Molnar – you are here!

Naki Rager

Maria Russell

Andrea Shell

Tina Smith

Tatiana Trafimovich

Amanda Wilcox

I hope you enjoyed this week full of inspiration. Now it is time to get your shopping lists ready! Happy shopping!

See you soon,

Zsofi

Newton’s Nook Designs June Release – DAY 3

Hello Everyone,

We are halfway through the sneak peeks at the June release of Newton’s Nook Designs. Today our team is showcasing a great horse set matching the farming theme called Neigh. It also comes with coordinating dies! All new products will be available on Friday 19th June 2020!

I started stamping and colouring the cute horses using my Copic markers. I made them all the same colour but this scene would look fabulous with different colours too. I cut them all with their coordinating dies.

For the background I die cut a postage stamp panel with the Frameworks die set from white cardstock and masked off the edges with Purple Tape. I sponged a light layer of Salty Ocean Distress Oxide ink on it and then repeated the same colour over the Cloudy sky stencil just with heavier hand. I love the tone on tone look!

I also die cut a Fence from woodgrain cardstock and grass with the Land border die and assembled the scene.

I white heat embossed the sentiment directly on the background and embellished it with the horseshoe.

I adhered the panel on a kraft A2 sized top folding card base, emphasized the eyes with a black glaze pen and added drops of glossy accents to the feet and the horseshoe. I cannot wait to give this card to my horse-loving husband!

GIVEAWAY

Would you like to win the “Neigh” Stamp Set? This stamp set will be given away to ONE lucky winnerHere’s how to win: Comment on the NND blog and Design Team blogs (see list below)! Thewinner will be chosen at random from the collective reveal posts. Make sure to check out each of their blogs and comment for your chance to win. You will not know which blog has been chosen so the more you comment on the better your chances are of winning! You have until Thursday June 18th at 9pm EST to comment  — winners will be announced on the blog post on Friday, June 19th. 

Check out all the awesome Design Team Blogs below to enter:

Newton’s Nook Designs

Ellen Haxelmans

Larissa Heskett

Samantha Mann

Zsofia Molnar – you are here!

Naki Rager

Maria Russell

Andrea Shell

Tina Smith

Tatiana Trafimovich

Amanda Wilcox

I hope you enjoyed today’s reveal and you will come back tomorrow for the last day too!

See you,

Zsofi