Heffy Doodle and Inkon3 Blog Hop

Hello Everyone,

Welcome to the Heffy Doodle and Inkon3 Collaboration Blog Hop! Our design teams have come together to share some amazing inspiration featuring Heffy Doodle and Inkon3 products, and there are prizes up for grabs, too!

This was the first time for me to try Atelier inks. They are water reactive, come in bold, bright colours and so easy to blend! I was playing with them for a while, trying different techniques to create this vibrant card. Let me show you!

INK BLENDING

First I blended My Jam Purple, Peacock Blue, Goddess Green, Bee Sting yellow and Marilyn red using an ink blending tool. The ink pads are so juicy that I had to be super light handed at the beginning 🙂 Those colours are gorgeous! I used them on Bristol Smooth cardstock as it is my favouite one for ink blending thanks to its slicker surface.
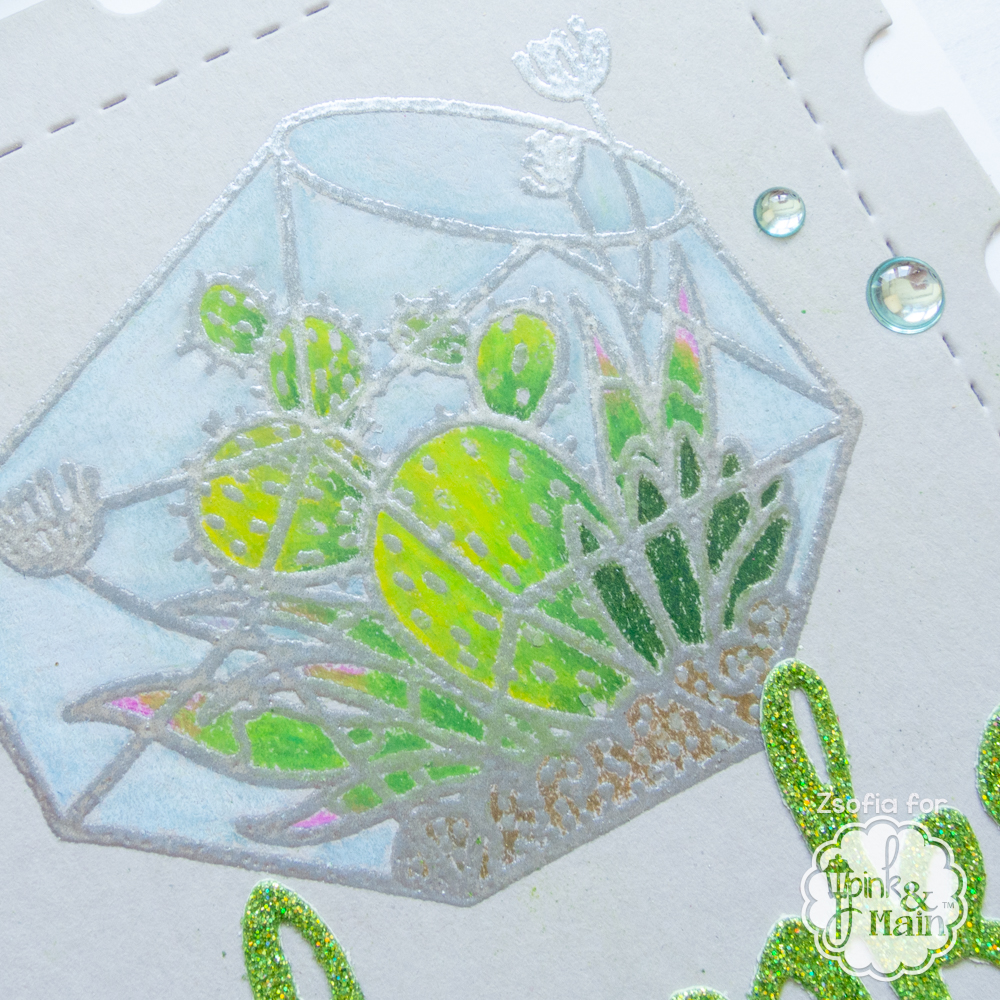
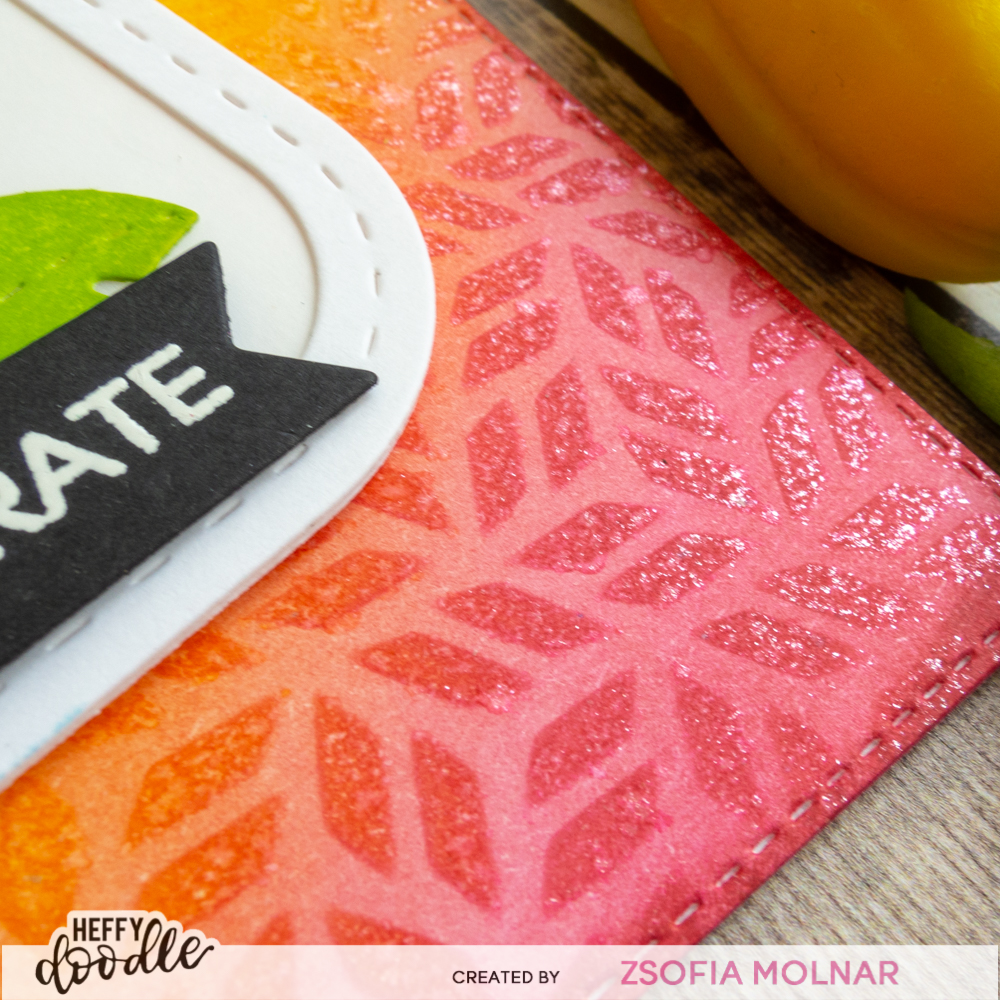
STENCILING

Then I took the Fancy foliage stencil from Heffy Doodle, sprayed it with Pixie Spray from Thermoweb to ensure it is not gonna shift while I am ink blending. I used the same colours just with heavier hands. Before removing the stencil I sprayed it with a handmade shimmer spritz: in a mini spritzer I added Liquid Pixie Dust and spritzed it over the entire surface. It gave such a pretty sparkle to the pattern!

DIRECT TO PAPER

I also wanted to try how bold the colours are if I simply apply the inkpads directly on the paper without a blending tool. I even managed to layer the colours and got that stunning teal colour – that is my favourite! Ohh my bold colour loving heart was jumping! I used the Amazoninan leaves die set from Heffy Doodle to create a rainbow of different leaves and tiny flowers.

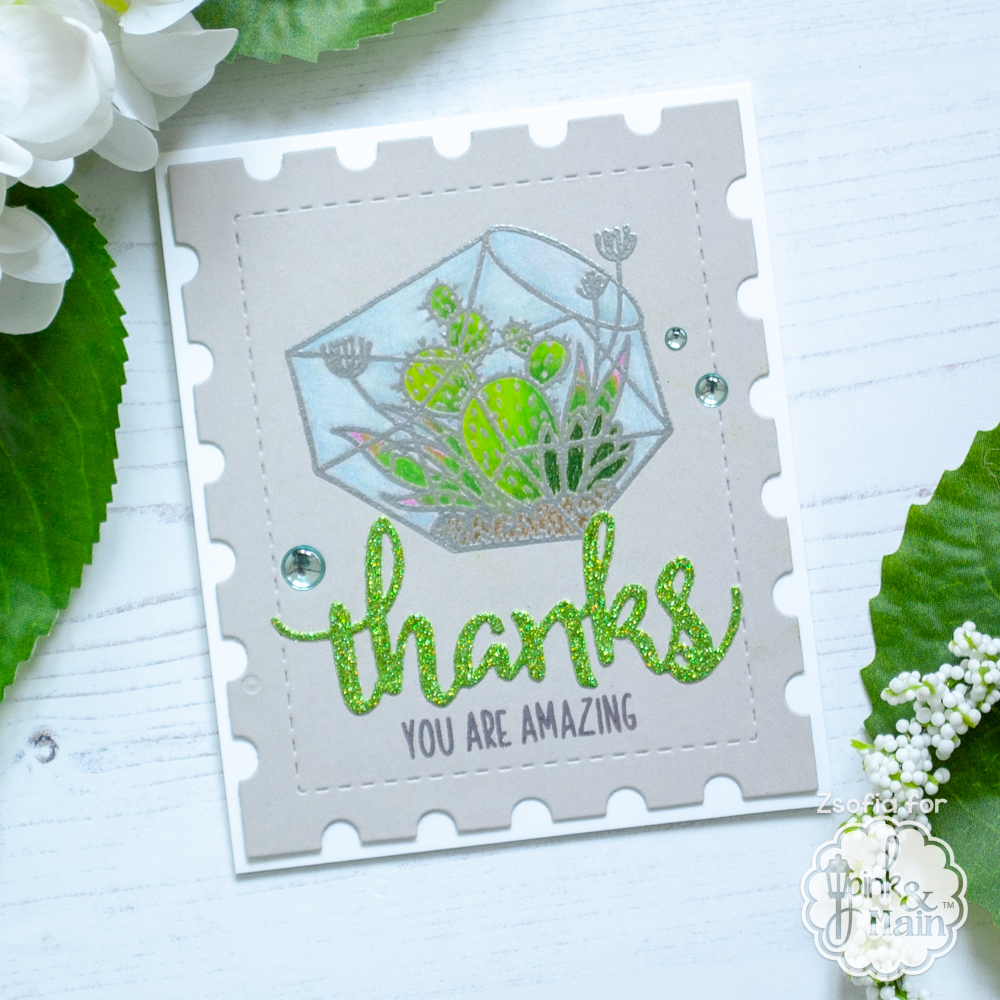
I cut down the background with an Imperial Stitched Rectangle die and also cut a tag using the Tag along die set. The frame and backing I cut from smooth white cardstock and I also cut a vellum backing to layer over the white one. It is not really visible on the pictures but in real life it smoothens the texture and makes the whole tag look so delicate!

I arranged the foliage, adhered everything in place. I used a chunky blue twine to embellish the tag and painted Liquid Pixie Dust over the flowers I also adde mini white pearls to the flower centers.

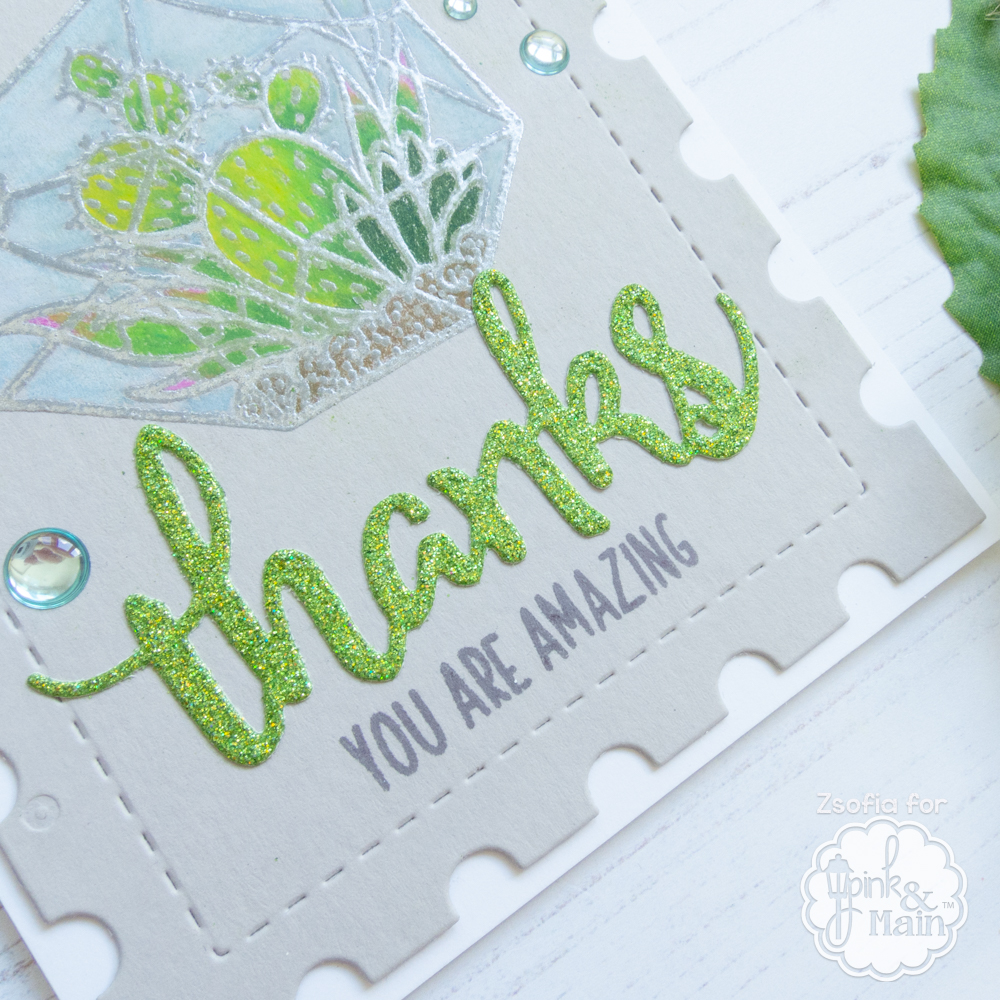
The sentiment I heat embossed on a black banner from the Heffy Doodle Party Palooza stamp set, and popped it up with 3D foam squares. For heat embossing I used the Inkon3 Juicy Clear embossing ink.

PRIZES AND GIVEAWAY INFO

Heffy Doodle will be giving away a 25£ CG and InkOn3 a 25$ CG to their respective stores.
Winners will be chosen randomly among all the comments left on the blog hop stops and announced on Sunday, June 7th on the Heffy Doodle and InkOn3 blog.

Remember to leave a comment on every stop in the hop to be entered to win!

InkOn3  Blog

Channin Pelletier

Jeannie Lieu

Ali Farmer

Dana Joy

Zsofia Molnar – you are here

Ilda Dias

Ashley Ebben

Cheryl Luu

Olga Mezentseva

Jaycee Gaspar

Heffy Doodle Blog

I hope you enjoyed my card and experiments with these awesome products. Thanks for leaving some love in the comments, it means so much to me. Happy hopping and hope to see you soon,

Zsofi

Marshmallows & cocoa – Lawn Fawn

Hello Everyone,

I am back with my last card for this year’s Coffee Lovers Spring/Summer Blog Hop. I have so many adorable Lawn Fawn sets that I simply had to make a springy card with them.

I combined several sets to create my scene: Party Panda, Fairy friends. Gleeful Gardens, Holiday helpers and Thanks a latte. I stamped the images on white alcohol ink friendly cardstock and coloured all the images with Copic markers. I used the coordinating dies to cut them out.

I used the Stitched cloudy backdrop die on a patterned paper from Watercolour wishes. I also cut grass with the grassy hillside border die and created a white frame for the scene using a Stitched rectangle frames die.

The sentiment I white heat embossed on a very thin stripe of black cardstock and adhered it to the frame from inside.

When assembling the scene I used liquid glue and 3D foam squares to get dimension. I love to layer my scenes, it is so fun!

For the background I chose a matching patterned paper from Perfectly plaid. A few clear sequins, googly eyes and a bit of clear shimmer on the flowers finished it off. I also added glossy accents to the mug and the nose of the panda.

I hope you enjoyed my coffee themed cards this week and you will keep checking back for more fun projects! I will also upload this card to the Simon Says Stamp Wednesday Challenge Anything goes.

Hugs,

Zsofi

Coffee…you’re unforgettable!

Hello Everyone,

I have another funny card inspired by my love for coffee 😀 This time I used stamps and dies from Pink and Main.

For this clean and simple design I first stamped the cute elephant from Ears to you and the little mug from an older set called Cocoa Cafe. I coloured them with my Copics and cut them out with the coordinating dies.

On a 3 inches tall and 4.25 inches wide white piece of cardstock I stamped a sentiment from Ears to you in black. I die cut the word Coffee using the Thin Aplha dies and Green Sparkle Sheet. I adhered them above the stamped sentiment and placed the sleeping elephant with the mug on top of the letters.

I gave the panel a black thin mat and chose a patterned paper from the Beach Babe paper pad as background. The only embellishment I used are tiny clay hearts which bring a little dimension to this otherwise flat card.

I will link this up to the Coffee Lovers Spring/Summer Blog Hop and to the Simon Says Stamp Wednesday Challenge Anything goes.

Hope you liked my card today and will come back tomorrow for another coffee related cutie! 😉

See you,

Zsofi

Coffee is my superpower – Heffy Doodle

Hello Everyone,

Welcome to another edition of my Perfect Combos series. It is a super special week as it is the Coffee Lovers Spring/Summer Blog Hop. I love to make coffee cards and when I was going through my Heffy Doodle stamps I saw the Superdudes set when the idea stroke. I matched it with a fun stencil and the Stitched alphabetters dies. Let’s dive in the details!

I started with stamping the superhero girl from Superdudes along with a bunch of coffee cups from an older limited edition set from a Simon Says Stamp Stamptember collaboration called More than S’mores. I used my Copic markers to add colour and cut everything out with the coordinating dies.

Then I focused on the background. Directly on a top folding white notecard I sponged Tumbled Glass Distress Oxide ink lightly. On the bottom of the card base I added a bit of Hickory Smoke Distress Oxide. Then I placed the Zapp Attack stencil over the blue sky and added more Tumbled Glass Distress Ink. Before removing the stencil I sprayed it all with a clear Shimmer Mist from Avery Elle. I love the subtle sparkle it gives!

I still needed a rooftop for my scene: I die cut the elements of the Lawn Fawn Rooftop border die set from Bristol Smooth Cardstock and using a blending brush I added Fired Brick Distress Oxide ink. Then I assembled the scene.

The sentiment I stamped from the Superdudes stamp set with black ink. Above it I adhered the die cut letters which spell Coffee. I used the Stitched Alphabetters dies and blue sparkle cardstock. It matches the chosen colour scheme.

As a finishing touch I added some shimmer with a clear shimmer pen and glossy accents to the little hearts, coffee caps and the badge of the superwoman. I love how it turned out, it makes me smile!

I wish it brings a smile on your face too!

This is my first entry for the Coffee Lovers Spring/Summer Blog Hop. I hope you enjoyed today’s Perfect Combo and will check back later for more inspiration. If you like my cards, please make sure to follow me on Instagram where I share my happy creations! Thank you!

See you soon,

Zsofi

Coloured pencil on grey – Pink and Main

Hello Everyone,

I brought you a fun technique today which I have not tried for a while. It is using coloured pencils on grey cardstock on a heat embossed image from Pink and Main.

This image has an empty alt attribute; its file name is PM_cactus_zsm01b-1.jpg

Heat embossing on its own is so pretty, I usually use white embossing powder or black, but today I wanted something more elegant. I used silver embossing powder on one of the images from the Terrariums stamp set on grey cardstock. Then I used my Prismacolor pencils to add colour to it. I started with the darkest shade next to the embossed lines and blended it out with a medium shade. I finished it off with the lightest colour, making sure that I get a nice blending. I still have a lot to practice but I love the delicate look coloured pencils give.

This image has an empty alt attribute; its file name is PM_cactus_zsm05-1.jpg

I cut the panel down with a Postage die. While I was at die cutting I also cut the word Thanks from green sparkle sheet and adhered it under the coloured image. I stamped a sentiment from the Thanks to you stamp set under it with grey ink.

This image has an empty alt attribute; its file name is PM_cactus_zsm02-1.jpg

I used liquid glue to add the panel to a white top folding note card and embellished the scene with a couple of light blue glossy dots.

This image has an empty alt attribute; its file name is PM_cactus_zsm04-1.jpg

I hope you enjoyed today’s inspiration and you will come back for more.

See you soon,

Zsofi

Newton’s Nook Designs May Release – Day 4

We have reached the last day of the Newton’s Nook Designs May Release reveals. Kitty lovers, have no fear, there is new release without our favourite cat! Newton’s flower garden is a super cute Spring set, coming with coordinating dies.

All new products will be available on 22nd May, 2020.

For my card I stamped the kittens on white cardstock and coloured them with Copic markers. I used scissors to cut them out together with all the little accessories.

I wanted to create a cute Spring scene, and I chose a pretty patterned paper from the French Kiss Doodlebug Designs paper pad to be the background. I die cut a piece of vellum with the postage stamp die from Frameworks and added grass with a Land border die. I also used the Sky scene builder set to cut the sun and clouds.

I stamped the sentiment in the middle of the sun so it could be part of the scene.

I assembled the scene on the vellum first so I could hide the adhesive behind the images while adhering the panel to the patterned paper. In this way nothing shows through.

I finished the design with drops of glossy accents in the flower centers, butterflies and kitty noses.

GIVEAWAY

Would you like to win the “Newton’s FLower garden”  stamp set? We will choose ONE lucky winner for this stamp set!

Here’s how to win: Comment on the NND blog and Design Team blogs (see list below)! Thewinner will be chosen at random from the collective reveal posts. Make sure to check out each of their blogs and comment for your chance to win. You will not know which blog has been chosen so the more you comment on the better your chances are of winning! You have until Thursday May 21st at 9pm EST to comment  — winners will be announced on the blog post on Friday, May 22nd. 

Check out all the awesome Design Team Blogs below to enter:

Newton’s Nook Designs

Ellen Haxelmans

Larissa Heskett

Samantha Mann

Zsofia Molnar – you are here

Naki Rager

Maria Russell

Andrea Shell

Tina Smith

Tatiana Trafimovich

Amanda Wilcox

I hope you enjoyed this week full of new product reveals and inspiration. Now it is time to write your shopping list! 😉 If you enjoy my style of cardmaking, please subscribe to my blog and follow me on Instagram where I share my happy cards. Your support means so much to me! Thank you!

See you soon,

Zsofi

Newton’s Nook Designs May Release – Day 3

Hello Everyone,

We are halfway through the sneak peeks at Newton’s Nook Designs’ May Release. Today the Design Team shows you the beautiful and elegant Hummingbird stamp and die set in action.

All new products will be available on 22nd May, 2020.

For my card today I stamped the all the images from the Hummingbird stamp set and coloured them with Copic markers. When I was done, I fussy cut them out.

I created a Distress Oxide ink background using Blueprint Sketch, Mermaid Lagoon and Peacock Feathers. Then I laid the Clouds stencil over the panel and added Ranger Distress Crackle paste with a stencil pal. After drying it cracks, I love this paste! To make it more distressed, I went back with the same colours over the clouds. Looks so pretty in my opinion.

When it was all done and dry, I cut it down with the scalloped rectangle die from Frames and Flags. I also cut a Fence from white woodgrain cardstock and grass with a Land border die.

The sentiment I stamped on a white cardstock strip and cut one edge down with the scalloped rectangle die. I popped it up on the scene with 3D foam squares and embellished it with a tiny yellow stamped flower.

After I popped up the hummingbird with dimensional adhesive, I added some details with a Sakura Star Dust pen for some sparkle and emphasized the eyes and flower stamens with a black glaze pen.

GIVEAWAY

Would you like to win the “Hummingbird”  stamp set? We will choose ONE lucky winner for this stamp set!

Here’s how to win: Comment on the NND blog and Design Team blogs (see list below)! Thewinner will be chosen at random from the collective reveal posts. Make sure to check out each of their blogs and comment for your chance to win. You will not know which blog has been chosen so the more you comment on the better your chances are of winning! You have until Thursday May 21st at 9pm EST to comment  — winners will be announced on the blog post on Friday, May 22nd. 

Check out all the awesome Design Team Blogs below to enter:

Newton’s Nook Designs

Ellen Haxelmans

Larissa Heskett

Samantha Mann

Zsofia Molnar

Naki Rager

Maria Russell

Andrea Shell

Tina Smith

Tatiana Trafimovich

Amanda Wilcox

I hope you enjoyed today’s reveals and will pop in tomorrow for some kitty fun 😉

See you,

Zsofi

Newton’s Nook Designs May Release – Day 2

Hello Everyone,

It is the secon day of the Newton’s Nook Designs May Release reveals and we continue with a beautiful butterfly stamp/die set and a gorgeous new stencil set! Fantastic, right?

All new products will be available on 22nd May, 2020.

For my card today I stamped the pretty butterflies from the Monarchs stamp set and coloured them with Copic markers. When I was done, I fussy cut them and covered them with clear shimmer using a shimmer pen. Their bodies I made shiny with glossy accents.

I was longing to play with my new Ranger alcohol inks so I created a simple background with a felt applicator on Yupo paper. I used Fiesta, Gumball, Shellpink, Dandelion and Lemonade inks, put a drop on the felt, added a bit of blending solution and wiped the Yupo paper with it. So easy and yet stunning!

When my background was dry, I cut it down with the rounded rectangle die from Frames and Flags. I added a black mat to it and cut a postage stamp panl from a textures yellow cardstock using the Frameworks die set. I adhered it all to a pink patterned paper from Sunny studio.

The sentiments I stamped in black on white cardstock and cut them out with a thin banner die from Lawn Fawn (Everyday sentiments banners).

I assembled the card, popped up the butterflies with thin 3D foam squares and finished it off with some sparkling sequins.

GIVEAWAY

Would you like to win the“Monarchs”  stamp set? We will choose ONE lucky winner for this stamp set!

Here’s how to win: Comment on the NND blog and Design Team blogs (see list below)! Thewinner will be chosen at random from the collective reveal posts. Make sure to check out each of their blogs and comment for your chance to win. You will not know which blog has been chosen so the more you comment on the better your chances are of winning! You have until Thursday May 21st at 9pm EST to comment  — winners will be announced on the blog post on Friday, May 22nd. 

Check out all the awesome Design Team Blogs below to enter:

Newton’s Nook Designs

Ellen Haxelmans

Larissa Heskett

Samantha Mann

Zsofia Molnar

Naki Rager

Maria Russell

Andrea Shell

Tina Smith

Tatiana Trafimovich

Amanda Wilcox

I hope you enjoyed today’s reveals and will pop in tomorrow for another beauty!

See you,

Zsofi

Newton’s Nook Designs May Release – Day 1

Hello Everyone,

I am super excited to share with you the news that Newton’s Nook Designs is having a new release in May! Get ready for a great bunch of fresh designs! Day 1 is all about a new Circle frame die set and matching stamps. For the sentiments there is a new Banner Trio die set coming too!

All new products will be available on 22nd of May, 2020.

CARD 1

For my first card I stamped the Floral Roundabout stamp on white alcohol ink friendly cardstock and coloured the pretty flowers with my Copic markers. I used cheerful bright colours, it fits my mood.

I cut the panel down to be a square and matted it with teal cardstock. I also cut a white scalloped square from Frames squared and created a grey card base measuring 4.25 x 4.25 inches.

As I don’t have the Banner Trio die set I used another banner die to cut the sentiment from white cardstock and popped it up in the middle of the card.

I finished the design with drops of glossy accents in the flower centers.

CARD 2

I wanted something different and show you another way how these Roundabout sets can be used. So I stamped the Birthday Roundabout on Bristol Smooth cardstock and used Distress Oxide inks to blend over the panel. Rainbow is my favourite colour you know 😀

Then I took the Mama Elephant Columbus Circle Framed tags die to cut a window in a black cardstock piece measuring 5,5×4,25 inches. I popped it up over the rainbow panel and added a strip of cardstock which I previously inkblended with the same colours.

I used 2 very thin silver glitter paper strips as embellisments and adhered the sentiment cut with the same banner die I used for the first card.

A bit of clear shimmer on the small images along with some glossy accents made it complete.

GIVEAWAY

Would you like to win the “Birthday Roundabout” or the “Floral Roundabout”  Stamp Set? We will choose ONE lucky winner for each stamp set! Here’s how to win: comment on the NND blog and Design Team blogs (see list below)! The winner will be chosen at random from the collective reveal posts. Make sure to check out each of their blogs and comment for your chance to win. You will not know which blog has been chosen so the more you comment on the better your chances are of winning! You have until Thursday May 21st at 9pm EST to comment  — winners will be announced on the blog post on Friday, May 22nd. 

Check out all the awesome Design Team Blogs below to enter:

Newton’s Nook Designs

Ellen Haxelmans

Larissa Heskett

Samantha Mann

Zsofia Molnar

Naki Rager

Maria Russell

Andrea Shell

Tina Smith

Tatiana Trafimovich

Amanda Wilcox

I hope you enjoyed today’s sneak peeks and will pop in again tomorrow for more fun!

See you,

Zsofi

Meerkat wishes – Pink and Main

Hello Everyone,

I am back with a very clean design, but versatile enough to be used for multiple occasions. I was playing with stamps and stencils from Pink and Main.

I started with the Mask it Square stencil and blended Tumbled glass Distress Oxide ink wih the Ergonomic Blending Brush in the middle of a 4.25×5,5 inch Bristol Smooth cardstock piece. Then I covered the blue square with the inner part of the stencil and moved the frame tiny to the right. I applied Mermaid Lagoon Distress Oxide ink. I did the same on the left side too. Then I covered the squares and repeated the previous step with Blueprint Sketch Disress Oxide. It is such a cool pattern and could be done with any geometric stencil and any colour combo!

Then I stamped the meerkat from the Meerkats stamp, coloured him with Copics and fussy cut him out. I used a black glaze pen on his eyes an nose to make it shiny.

I white heat embossed a sentiment on black cardstock and cut it down to be a small sign the meerkat can hold.

I used a stitched rectangle to cut down the stenciled background a bit and assembled the card on a kraft card base. The meerkat I popped up with 3D foam squares for more dimension.

I finished the card with tiny clear sequins. Isn’t it cute? Fitting any gender for any occasion, I really need cards like this in my stash! I hope I inspired you and you will pop in again soon for more ideas.

See you,

Zsofi