Heffy Doodle and Honey Bee Stamps Blog Hop

Hello Everyone,

I am so excited to be part of the Heffy Doodle and Honey Bee Stamps Collaboration Blog Hop! I love both companies, they have amazing designs and so easy to combine them! I have 2 cards for you today in different styles: one elegant and one cute. Let me guide you through the cardmaking process.

CARD 1

For my first card I die cut a Heffy Doodle Stitched Rectangle from Copic friendly cardstock and stamped the Honey Bee Stamps Pretty Postage image on it. I used my Copics to colour it, kept the colours simple: reds and aqua. I added some dots when I was done with the colouring to add some texture to the leaves and flowers. I also used a black glaze pen to go over all the little black dots and a white gel pen for even more texture.

Then I die cut the Heffy Doodle Miss you sentiment: the shadow I cut from vellum, the sentiment itself I cut 2 times from dark red cardstock and layered them on top of each other. Even 2 layers make instant dimension!

I also stamped another sentiment from the Heffy Doodle More Classic sentiments set under the envelope, they go so well together.

I gave the panel a teal mat and chose a pretty patterned paper from the Honey Bee Stamps Love Letters paper pad for the background. As a finishing touch I added glossy accents to the hearts. Isn’t it pretty? If you want to have coordinating envelopes, Honey Bee Stamps has them ready for you! So cool!

CARD 2

For my second card I used a fun mirror stamping and die cutting technique. Jennifer McGuire has a great video on this, you find it here.

I stamped the cute racoon from Honey Bee Stamps Stolen my Heart stamp set with Lawn Fawn Jellyfish ink: it allowed me to do some no-line colouring and it is Copic marker friendly. For the mirror stamping I used MFT Mirror Image stamp but any big solid stamp would do. I managed to die cut both little racoons with the coordinating die, I followed Jennifer’s instructions. As the face expression wasn’t visible, I drew it back with a black thin line marker.

Then I used the Slimline die sets from Heffy Doodle to create the layers: a scalloped red rectangle (Slimline Pull Tab dies), a bit smaller dark grey stitched rectangle and a pretty frame (Stitched Slimline Trio) from cream cardstock (I love the Speckled Eggshell from Lawn Fawn). In the openings of the frame I used patterned paper from the Honey Bee Stamps Love Letters paper pad. I also inserted a light pink mat in between the dark grey rectangle and the frame.

The sentiment is from the Honey Bee Stamps Stolen my heart set: I heat embossed it on vellum with black sparkle embossing powder 2 times for a raised look. I used my Misti stamping tool for this, but even one layer of embossing powder givs a beautiful result! I used the coordinating die to cut it out and adhered it to the middle window using tiny drops of liquid glue behing the letters.

The card base is 3,5*8,5 inches. I popped up the racoons with 3D foam suares, added glossy accents to the nose and hearts and embellished the frame with tiny jewels from the Honey Bee Stamps Love letters gem collection. I love how this turned out, I hope it makes you smile too!

GIVEAWAY

Both brands’ Design Teams have created wonderful inspiration for you. Make sure to comment along the way for your chance to win! Honey Bee Stamps will be giving away $30 and Heffy Doodle will be giving away £25 to their respective stores!  Be sure to comment before 11:59 PM on Feb 3rd to be entered to win!

Each company will post their random winner on Feb 4th  at 10AM EST!  Make sure to check the Heffy Doodle Blog and Honey Bee Stamps Blog to see if you’re a winner! Here is the full hop list:

Heffy Doodle Blog

Zsofia Molnar – you are here

Brenda Noelke

Ashley Ebben

Farhana Sarker

Megan Quinn

Jenn Bena

Joy Baldwin

Honey Bee Stamps Blog

I hope you enjoyed today’s cards and will check back later for more inspiration. If you like my cards, please make sure to follow me also on Instagram where I share my happy creations! Your support means so much to me! Thank you!

See you soon,

Zsofi

Sending hugs – Lawn Fawn

Hello Everyone,

I have a super cute stenciled card for you today using some new and old sets from Lawn Fawn. I am so happy that they have their own stencils too, I am totally addicted to stenciling tehniques. Here I used an old favourite of mine, let me show you how.

First I started with a light ink blending: on Bristol Smooth cardstock I applied Scattered Straw, Spiced Marmelade and Abandoned Coral Distress Oxide inks with blending brushes. I tried to be light handed which is always a challenge for my bright colours loving heart 🙂

Then I used the hearts from the Conversation Hearts Layering stencil with Mustard Seed, Abandoned Coral and Candied Apple Distress Oxide inks. Before removing the stencil I spritzed it with Tsukineko Shimmer Spritz for a subtle sparkle. After removing the stencil I added black, white and red splatters and dried it with my heat tool. When it was dry I layered the other stencil over the hearts and used Deco Foil Metallix gel in Black Ice colour. I like to use a stencil pal when applying pastes, it makes it a breeze.

While my background was drying I stamped and coloured the hedgehogs from the Hedgehugs set and used the coordinating dies to cut them out. I also cut a black Sending Hugs Line Border and a Lacy Heart from Raspberry cardstock.

I cut the stenciled panel down with a stitched rectangle die and cut a stitched heart in the middle. I layered the lacy heart under it and adhered it back in place. I adhered the hedgies and the sentiment and matted the whole panel with peach cardstock before mounting it on a white top folding A2 sized card base.

Whis is my first entry for the current Lawnfawnatics Challenge #93 Lot of love and the Simon Says Stamp Wendesday Challenge Anything goes.

I hope you like today’s inspiration, make sure to come back for a fun blog hop tomorrow!

See you,

Zsofi

Valentine Beeps – Heffy Doodle

Hello Everyone,

It is Zsofi here, welcome to another edition of my Perfect Combos series for Heffy Doodle. Valentine’s Day is approaching but we do not have to wait till then to show a little love, do we? I have combined a few Heffy cuts with the Bots of Love stamp/die set for this cheerful love card. Let’s dive in the details!

First I stamped and coloured the images keeping the colour palette simple: neutral greys and pinky reds. I used my Copic markers and cut everything out with the coordinating dies.

Then I ran the Stitched Hearts background die through my die cutting machine with heavy weight white cardstock. Then I took an oval die (Ovally Excited die set) and cut it from the stitched background. I love the texture I get this way!

While I was at die cutting I also cut the I love you sentiment from pink and white cardstocks and white heat embossed a sentiment from the Bots of love stamp set on a thin black strip.

For the background I chose a pink checked patterned paper and assembled the card. I scattered a few crystals as embellishments and used a black glaze pen on the eyes and flower centers and added a tiny drop of glossy accents on the hearts of the robots. Isn’t it cute? I cannot wait to make more of this design just in different colours!

I hope you enjoyed today’s Perfect Combo and will check back later for more inspiration. If you like my cards, please make sure to follow me on Instagram where I share my happy creations! Thank you!

See you soon,

Zsofi

Newton’s Nook Designs January Release – DAY 4

This image has an empty alt attribute; its file name is nnd_jan21_releaseicon.jpg

Hello Everyone,

It is the final day of the Newton’s Nook Designs January Release reveals but we still have 2 super cute sets to show you: Love cafe and Newton’s Mug are both smaller sets and come with matching die sets.

All products will be available on Friday, 22/01/2021!

CARD 1

For my first card I have stamped the Love Cafe mugs with black hybrid ink so I could colour with my Copics. I also stamped the coffee beans with Gathered Twigs Distress Oxide ink several times and heat embossed thm with clear embossing powder. I just love the shiny look.

Then I die cut the postage stamp die from Frameworks from kraft cardstock and another one from pattered paper. I cut the latter down to be a strip on the bottom of my card and added a very thin strip of pink glitter paper on the top of it before popping up the images with 3D foam squares.

The sentiment I stamped with Lucky Clover Distress Oxide and heat embossed it with clear embossing powder.

I used the steam hearts as embellishments and covered the decoration on the mugs with clear shimmer and glossy accents too. I also stamped another sentiment from the set directly on the patterned paper, I love the playful fonts so much!

CARD 2

On my second card I used paper piecing which I have not done in a while. I stamped Newton’s Mug on white Copic friendly cardstock and another time on patterned paper (Echo Park Coffee and Friends). I coloured the kitty with Copics and fussy cut the mug out from the patterend paper directly at the black outline. I adhered it on the white cup and added shading with a warm grey Copic marker. The result is stunning and it took less time than if I coloured it myself.

I used the Fancy Edges Tag die set and cut the base from cream cardstock and vellum. The topper I cut from light green and the reinforcer from brown cardstock. I also added a bit of kraft to the bottom to serve as a table and it also makes the vellum tag sturdier.

The sentiment I white heat embossed on a stitched brown circle from Circle Frames and I also die cut another patterned paper from the same paper pack with the scalloped rectangle from Frames and Flags.

I assembled the card on a kraft card base and used natural twine for the tag as embellishment. No shimmer this time but I added glossy accents to the nose of the kitty and to the coffee beans.

GIVEAWAY

Would you like to win the “Love Café” or the “Newton’s Mug” Stamp Set? We will choose ONE lucky winner for each stamp set! Here’s how to win: Comment on the NND blog and Design Team blogs (see list below)! Thewinner will be chosen at random from the collective reveal posts. Make sure to check out each of their blogs and comment for your chance to win. You will not know which blog has been chosen so the more you comment on the better your chances are of winning! You have until Thursday January 21st at 9pm EST to comment  — winners will be announced on the blog post on Friday, January 2nd. 

Check out all the awesome Design Team Blogs below to enter:

Newton’s Nook Designs

Ellen Haxelmans

Tina Herbeck

Larissa Heskett

Samantha Mann

Zsofia Molnar -> you are here

Maria Russell

Farhana Sarker

Tatiana Trafimovich

Samantha VanArnhem

Amanda Wilcox

I hope you enjoyed this love filled week with all the inspiration. It is time now to get your shopping lists ready as all these adorable new sets will be available tomorrow!

See you soon,

Zsofi

Newton’s Nook Designs January Release – DAY 3

Hello Everyone,

we are halfway through the Newton’s Nook Designs January Release reveals but fear not, cuteness is still coming your way! Love Emergency is a wonderful set, not only for love cards. It is definitely perfect for our other halves for Valentine’s Day though. It comes with coordinating dies too.

All products will be available on Friday, 22/01/2021!

I wanted to create a slimline card so I needed all the vehicles: I stamped and coloured them with Copic markers an cut them out with their coordinating dies.

Then I die cut the scalloped rectangle from Slimline Frames and Portholes and used the new square masking stencil to add the background with Blueprint Sketch Distress Oxide ink. Before removing the stencil I sprinkled it with water and diluted Blueprint Sketch ink. I also added black and white splatters for a fun textured look.

When the inked background was all dry, I popped up the cars with 3D foam suares and stamped a matching sentiment above each little scene.

I adhered the panel to a striped patterned paper before mounting it on a slimline card base, and used a clear shimmer pen and glossy accents to emphasize some details.

GIVEAWAY

Would you like to win the “Love Emergency” Stamp Set? We will choose ONE lucky winner for this stamp set! Here’s how to win: Comment on the NND blog and Design Team blogs (see list below)! Thewinner will be chosen at random from the collective reveal posts. Make sure to check out each of their blogs and comment for your chance to win. You will not know which blog has been chosen so the more you comment on the better your chances are of winning! You have until Thursday January 21st at 9pm EST to comment  — winners will be announced on the blog post on Friday, January 2nd. 

Check out all the awesome Design Team Blogs below to enter:

Newton’s Nook Designs

Ellen Haxelmans

Tina Herbeck

Larissa Heskett

Samantha Mann

Zsofia Molnar -> you are here

Maria Russell

Farhana Sarker

Tatiana Trafimovich

Samantha VanArnhem

Amanda Wilcox

I hope you enjoyed today’s inspirations and reveals. Make sure to return tomorrow for the last day of the sneak peeks!

See you,

Zsofi

Newton’s Nook Designs January Release – DAY 2

Hello Everyone,

Welcome to Day 2 of Newton’s Nook Designs January Release reveals! We have the cutest kitties ever and some fantastic Slimline Masking stencils!

All products will be available on Friday, 22/01/2021!

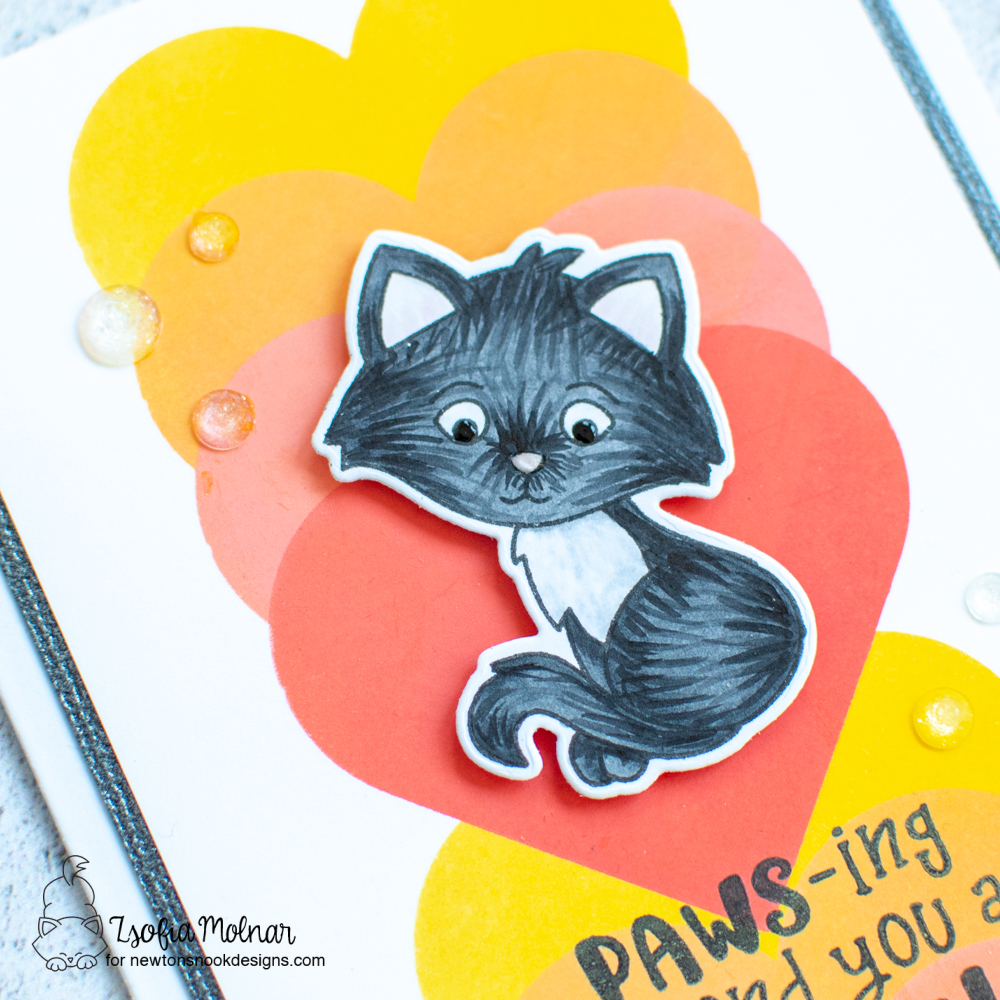
For my card I stamped and coloured the kitties from Smitten Kitten with my Copics. I knew I wanted a colourful background so I kept them black and white. I added some furry details too for a bit different look. I used the coordinating dies to cut them out.

I chose Bristol Smooth cardstock for the background: I cut a piece which fits a slimline cardstock. I used the Masking Hearts stencil with Distress Oxide inks. The first layer is Mustard Seed, followed by Spiced Marmelade, Worn Lipstick and Candied Apple. I used the gridlines engraved in the stencil to line it up each time with the edge of the cardstock. It is so easy to get an even spacing! I cannot wait to try this technique with all other masking stencils and different colours!

When it was done I cut the panel down to be slimmer than a slimline card front and matted it with dark grey pearl cardstock before adhering it to a white card base. I popped up the kitties with 3D foam tape and stamped a sentiment directly on the background in black.

I finished it off with a bunch of clear gems and emphasized the eyes of the kitties with a black glaze pen. I also added a tiny drop of glossy accents on their noses.

GIVEAWAY

Would you like to win the “Smitten Kitten” Stamp Set? We will choose ONE lucky winner for this stamp set! Here’s how to win: Comment on the NND blog and Design Team blogs (see list below)! Thewinner will be chosen at random from the collective reveal posts. Make sure to check out each of their blogs and comment for your chance to win. You will not know which blog has been chosen so the more you comment on the better your chances are of winning! You have until Thursday January 21st at 9pm EST to comment  — winners will be announced on the blog post on Friday, January 2nd. 

Check out all the awesome Design Team Blogs below to enter:

Newton’s Nook Designs

Ellen Haxelmans

Tina Herbeck

Larissa Heskett

Samantha Mann

Zsofia Molnar -> you are here

Maria Russell

Farhana Sarker

Tatiana Trafimovich

Samantha VanArnhem

Amanda Wilcox

I hope you enjoyed today’s inspirations and reveals. Make sure to return tomorrow for more fun!

See you,

Zsofi

Newton’s Nook Designs January Release – DAY 1

Hello Everyone,

I am thrilled to say that we are starting the Newton’s Nook Designs January Release reveals today! YAY! Get ready for a love-filled week! Today our wonderful team is showcasing the new Heartfelt Love and Heartfelt Roses stamp sets with a matching die set which totally coordinates with the previously revealed Banner Trio die set!

All products will be available on Friday, 22/01/2021!

CARD 1

For my first card I have stamped the Heartfelt Roses with a light hybrid ink so I could do no-line colouring with my Copics. I don’t do this often but it was such a lovely time spent!

When I was happy with how it looked I cut it out with the scalloped heart from Heart Frames, and used the biggest heart die from the set to create my own red card base: I die cut it twice, scored on of them half an inch form the top and glued that little flap to the back of the other heart. So easy and looks so special!

I white heat embossed a sentiment on a green stitched banner which I cut with the Banner Trio die set. I popped it up with 3D foam suares and adorned the card with a few clear gemstones.

CARD 2

For my second card I simply white heat embossed the image from Heartfelt Love on Bristol Smooth cardstock and applied Distress Oxide inks over it: Seedless Preserves, Worn Lipstick, Spiced Marmelade. When it was dry I die cut it with the scalloped heart from Heart Frames. I used a clear shimmer pen to add a bit of extra bling to the little hearts.

On a fog cardfront I adhered a big dark grey stitched heart from the same die set and laid two pieces of organza ribbon over it before popping up the focal image. The ribbon I secured on the back of the fog card front with scotch tape and mounted it on a white card base.

I somehow felt that the plain grey background is a bit too simple, so I simply grabbed the XOXO sentiment and stamped it several times with an acrylic block and Fog ink. It gives a very subtle tone-on-tone look.

The sentiment I heat embossed in white on a purple banner from Banner Trio. I adorned it with two white pearls and it was all finished.

GIVEAWAY

Would you like to win the “Heartfelt Love” or the “Heartfelt Roses” Stamp Set? We will choose ONE lucky winner for each stamp set! Here’s how to win: Comment on the NND blog and Design Team blogs (see list below)! Thewinner will be chosen at random from the collective reveal posts. Make sure to check out each of their blogs and comment for your chance to win. You will not know which blog has been chosen so the more you comment on the better your chances are of winning! You have until Thursday January 21st at 9pm EST to comment  — winners will be announced on the blog post on Friday, January 2nd. 

Check out all the awesome Design Team Blogs below to enter:

Newton’s Nook Designs

Ellen Haxelmans

Tina Herbeck

Larissa Heskett

Samantha Mann

Zsofia Molnar

Maria Russell

Farhana Sarker

Tatiana Trafimovich

Samantha VanArnhem

Amanda Wilcox

I hope you enjoyed today’s inspirations and reveals. Make sure to return tomorrow for more fun!

See you,

Zsofi

Inktense pencils – winter scene

Hello Everyone,

I am popping in today with something new. In my latest order from Simon Says Stamp I had a pack of Suzy Plantamura’s watercolour prints with Winter Gnomes. I am fond of gnomes lately and I wanted to try to zone out and colour these with different mediums. The first one I coloured with Derwent Inktense pencils.

I started with the cap: I chose a darker red colour and drew some lines next to the outline. Then scribbled a little lighter one over it and spread the colours out with a wet paintbrush. Thanks to the pigments in this type of pencil the colours are really vibrant even with just a tiny scribble from the pencil.

I made sure to let it dry and meanwhile coloured another part of the image which was not connected to avoid mixing colours. For the snow I used light blue and for the background I mixed blues, violet and some darker purples.

I left the beard and moustache for the last: I tried to add light stokes with my pencils and then fade them out a bit with the waterbrush. It was fun and I like the result even though it was the first time!

When it was all dry I cut it down with a Wonky rectangle and stamped a sentiment (MFT stamps set) in black. I sprinkled white acrylic paint all over it with a toothbrush: it gives smaller dots than when I do this with a thin brush. I also added clear shimmer to the Moon, glossy accents to the skate and some fluffy texture to the cap and overall with my Marvy Snow Marker. It puffs up when I heat it up with my heat tool. So fun!

I hope you liked today’s inspiration, and will return soon for more!

See you,

Zsofi

Winter Birthday Wishes – Heffy Doodle

Hello Everyone,

I am back today with my Perfect Combos series for Heffy Doodle. As I need to boost up my birthday stash, I created a slimline winter birthday card mixing up a few stamps and dies and stencil. Let me guide you through the process.

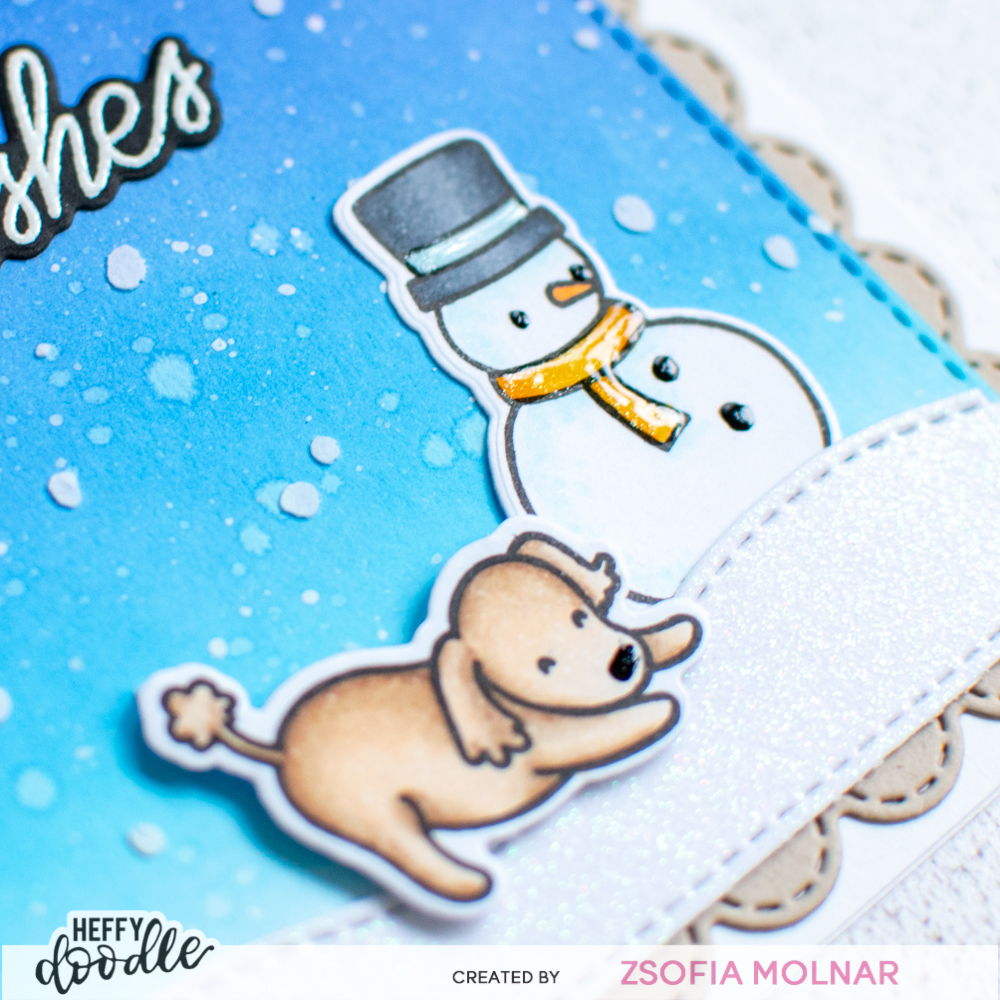
First I stamped and coloured the images from Happy Yappy Mail and Wanna Build a Snowman. I used Copic markers and cut everything out with their coordinating dies.

I also die cut a white rectangle with a Slimline Stitched Trio die and another one from white glitter cardstock. Then I used the partial die cutting technique to cut a snowbank from this with the Breaking Waves Border dies. It is easy to line it up with the stitches so it works perfectly for slimline cards too.

On the white panel I applied Blueprint Sketch and Salty Ocean Distress Oxide inks fadin it out toward tthe bottom. I spritzed it with water, added some white acrylic paint splatters and let it dry. Ok I was impatient and helped a bit with my heat tool too. When it was dry enough not to smear it, I added white texture paste through the First Snow stencil. Even though it is 6 inches long only, I could simply move it where the pattern has finished and add more snow drops. With this stencil it is very easy, you do not need to line anything up!

While the paste was drying I die cut a scalloped slimline rectangle from Neenah Desert Storm cardstock and also the word Birthday from orange glitter cardstock. The rest of the sentiment I white heat embossed on black cardstock and cut it out with its coordinating die. I love the look of a stamped and die cut sentiment!

When it was all dry I assembled the winter scene popping up the dogs with thin 3D foam sqquares. I finished them off with a black glaze pen on the eyes, noses, buttons and the pipe and added a bit of shimmer to the scarves and collars before sealing it with glossy accents.

I hope you enjoyed today’s Perfect Combo and will check back later for more inspiration. If you like my cards, please make sure to follow me on Instagram where I share my happy creations! Thank you!

See you soon,

Zsofi

Hug in a mug – Newton’s Nook Designs

Hello everyone,

Today is my turn on the Newton’s Nook Designs blog with this warm and wintery coffee card. In this chilly weather we are all longing for our favourite hot drinks and good talks. Now that we are all socially apart from our friends, it is so important to send a little love in other ways. That feeling inspired my card today.

I created a colourful background first on Bristol Smooth paper with the Mugs stencil: I used Distress Oxide inks with a small blending brush which allowed me to add colour to each mug individually. I used Blueprint Sketch, Wilted Violet, Picked Raspberry, Salty Ocean, Peacock Feathers with Cracked Pistachio. Before removing the stencil I carefully spritzed it with Tsukineko Shimmer Spritz and let it dry.

I cut it down with my favourite die from Frameworks and added some black and blue splatters. Then I cut my sentiment letters with the Essential Alphabet dies from coloured cardstock and adhered them on a piece of vellum. I adorned it with some pine leaves and a purple glittery bow (Pines and Holly die set).

After popping the panel up on a light grey cardstock I added glossy accents to some details on the mugs and also on the bow.

I hope it made your heart warm and I inspired you.

See you soon,

Zsofi